By Karen Rubin, with Laini Miranda and Dave E. Leiberman
Travel Features Syndicate, goingplacesfarandnear.com
Grand Staircase-Escalante National Monument is a Delaware-sized museum of sedimentary erosion that takes you down a 200-million-year-old “staircase” – a series of plateaus that descend from Bryce Canyon south toward the Grand Canyon.
But it’s relatively new and unexplored: it was the last part of the Lower 48 United States to get cartographed. President Bill Clinton set aside these 1.87 million acres as a national monument in 1996 because its untrammeled significance distinguishes it for researchers and explorers alike – but it has been controversial ever since, as Trump and Republicans sought to reverse its protected status, slash the size of Grand Staircase in half and neighboring Bears Ears by 85%,and open up vast sections of both – including areas sacred to indigenous people – to extraction and exploitation. Biden reinstated the protected areas in 2021.
Unlike the exceptionally popular and trafficked Capitol Reef (which we visited on our first two days of our Utah Adventure), Zion, Bryce Canyon and Arches National Park, Grand Staircase-Escalante is for more hard-core adventures – most of the trails are barely marked, require four-wheel drive to reach the trailhead, and have minimal services (you are on your own).
David and Laini have been here before, so have scouted and know the ropes – like how to drive down the rustic, 55-mile long Hole-in-the-Rock road that begins on Highway 12, just southeast of the town of Escalante, and ends at the edge of a cliff. That road leads to the trailheads of the minimally marked trails into many slot canyons that Laini most wants to explore. When they came the last time, the road was almost impassable – we are lucky today, that the gravel and sand are not so deep. (Pro tip: go in early spring shortly after the road is regarded; in summer and fall, the washboard road has been so well-traveled and destroyed that it takes over an hour to drive just 20 miles, even in a four-wheel drive car with high clearance, as David and Laini learned through experience).
Hole in the Rock Road is actually a famous historic Mormon Trail. The off-highway portion begins/ends near Halls Crossing on Utah Highway 276 and goes near to the pioneer crossing of the Colorado River (now Lake Powell). A large group of Mormon settlers in wagons traveled this route on a journey from Escalante to Bluff, which they expected to take six weeks but actually took six months. It is an amazing expanse of open country. This is also the famed road featured in Edward Abbey’s cult classic, “The Monkey Wrench Gang”.
Names here are very descriptive and should give you some idea (they might as well use skull and crossbones instead of trail markers): Devils Garden (the easiest and most enchanting hike), Spooky Gulch (a moderate hike), Little Death Hollow, Death Hollow (a difficult hike). And then there’s Hell’s Backbone – a rugged, 45-mile long mostly unpaved mountain road from Escalante to Boulder through Dixie National Forest into Box Death Hollow Wilderness area that climbs far up the southern slopes of Boulder Mountain, reaching the summit at 9,200 feet; without stops takes nearly 2 hours to drive, is closed in winter and usually impassable during the snowmelt season of late spring.
The canyons are a rugged, desolate adventurers’ paradise – Jurassic Park comes to mind – and draws hard-core hikers, canyoneers and other outdoors enthusiasts. There are very few people around (the town is tiny), even reaching the trailhead requires four-wheel drive capable of off-road, and the trails are not marked, beyond a sign at the trailhead, and even these are rare.
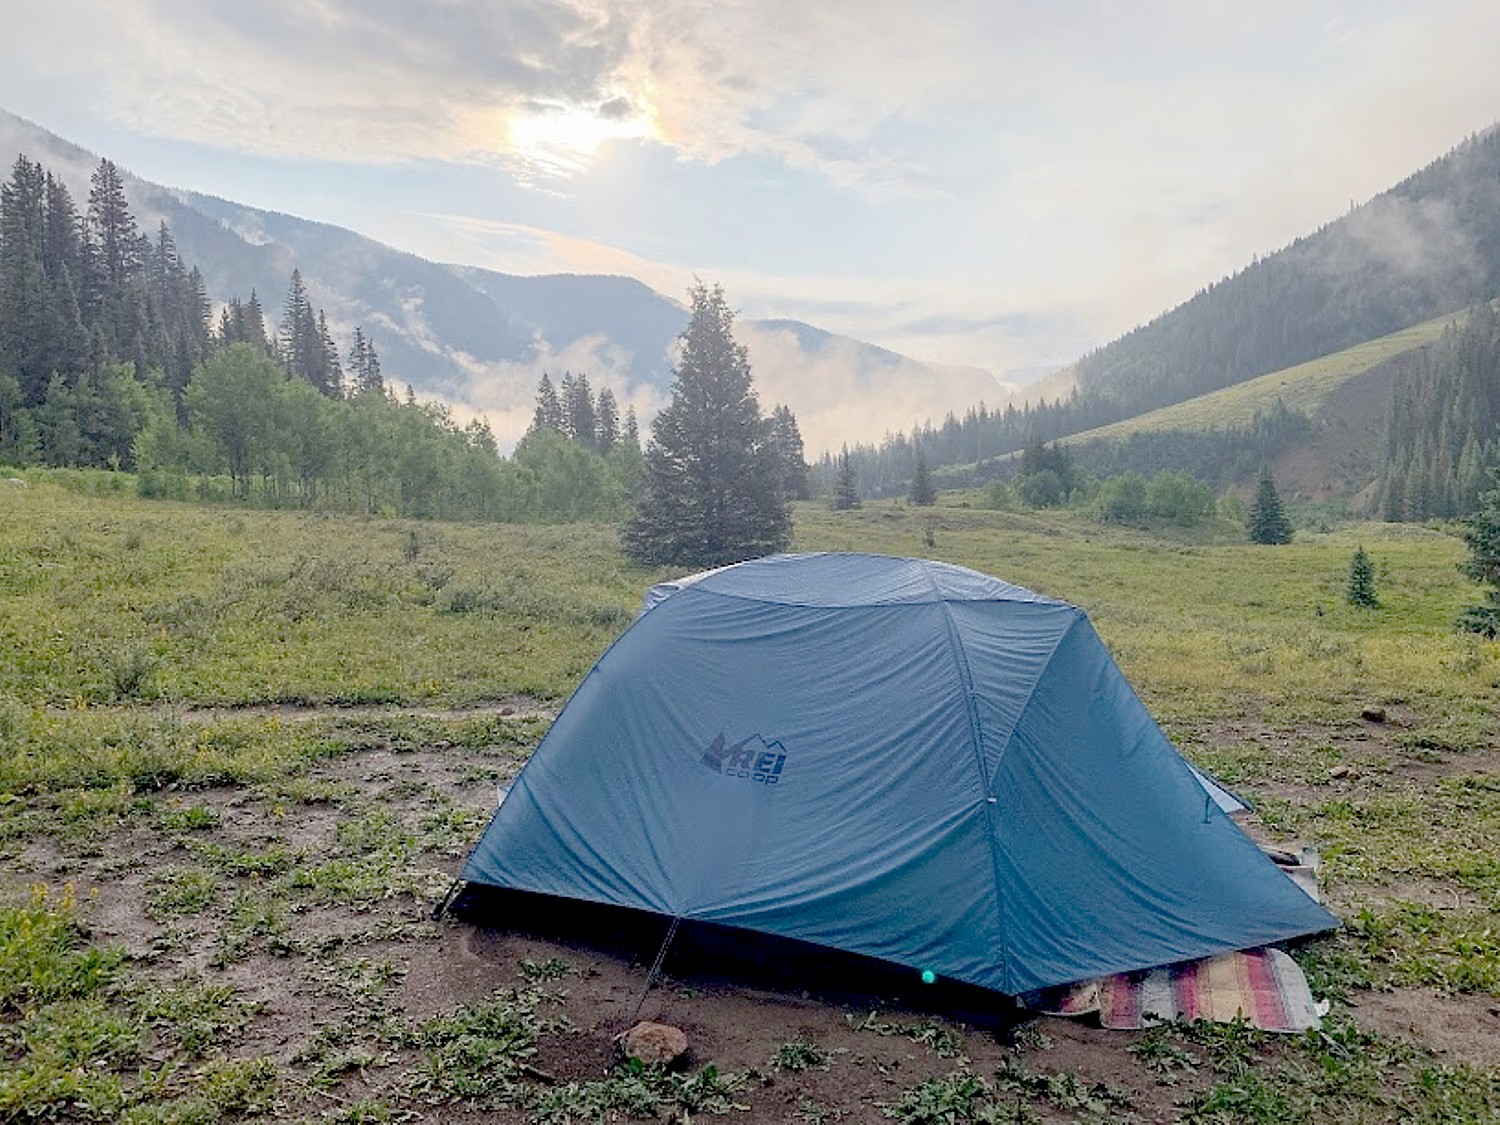
As we head out for hikes, we have to be extremely mindful of carrying enough water and snacks. David hauls a 5-gallon collapsible water jug that he stashes for the trip back, and carries a 4L Hydrapak water bladder that he uses to refill our personal water bottles. We’re here in cool weather, but in summer, it can be dangerously hot. You are cautioned not to start out on these hikes after 10 am. David and Laini are also big fans of the lightweight Clif Energy Bloks that you can stock up on at Escalante Outfitters in town, where we get breakfast before heading out.
Besides water, hat, sunglasses, sunscreen, snacks (and me a camera), a light compactable jacket, we try to carry as little as possible. (This means I can’t take my Nikon Z5 mirrorless –too big, bulky; on the more challenging hikes I rely on my Panasonic Lumix, my Olympus T6, and my Google Pixel phone, which actually capture the richest colors). Laini and David advise us that in some spots the slot canyons are only 10” wide and simply cannot accommodate a backpack.
On a previous trip, David and Laini had a sophic guide named Ace (or Yoda), who said things like, “Let the land reveal itself to you and you will ultimately find the red zone.” (I have no idea what the red zone represents but it sounds very Zen and I think it has something to do with the fact that there is no real trail – we have to find our own way using instinct, intuition, or just common sense, as well as the verbal descriptions of landmarks.)
(Actually, you don’t have to go off on your own – the Visitor Center can provide a list of outfitters in Escalante. David and Laini hired Ace Kvale on their first trip to the area; he’s a photographer and guide, https://acekvale.com/; see https://www.visitutah.com/Articles/Roaming-Grand-Staircase-Escalante. And apparently, there is actually a “red zone’, Laini tells me later, “literally an area of red swirly mounds in the middle of the otherwise white and yellow landscape.”)
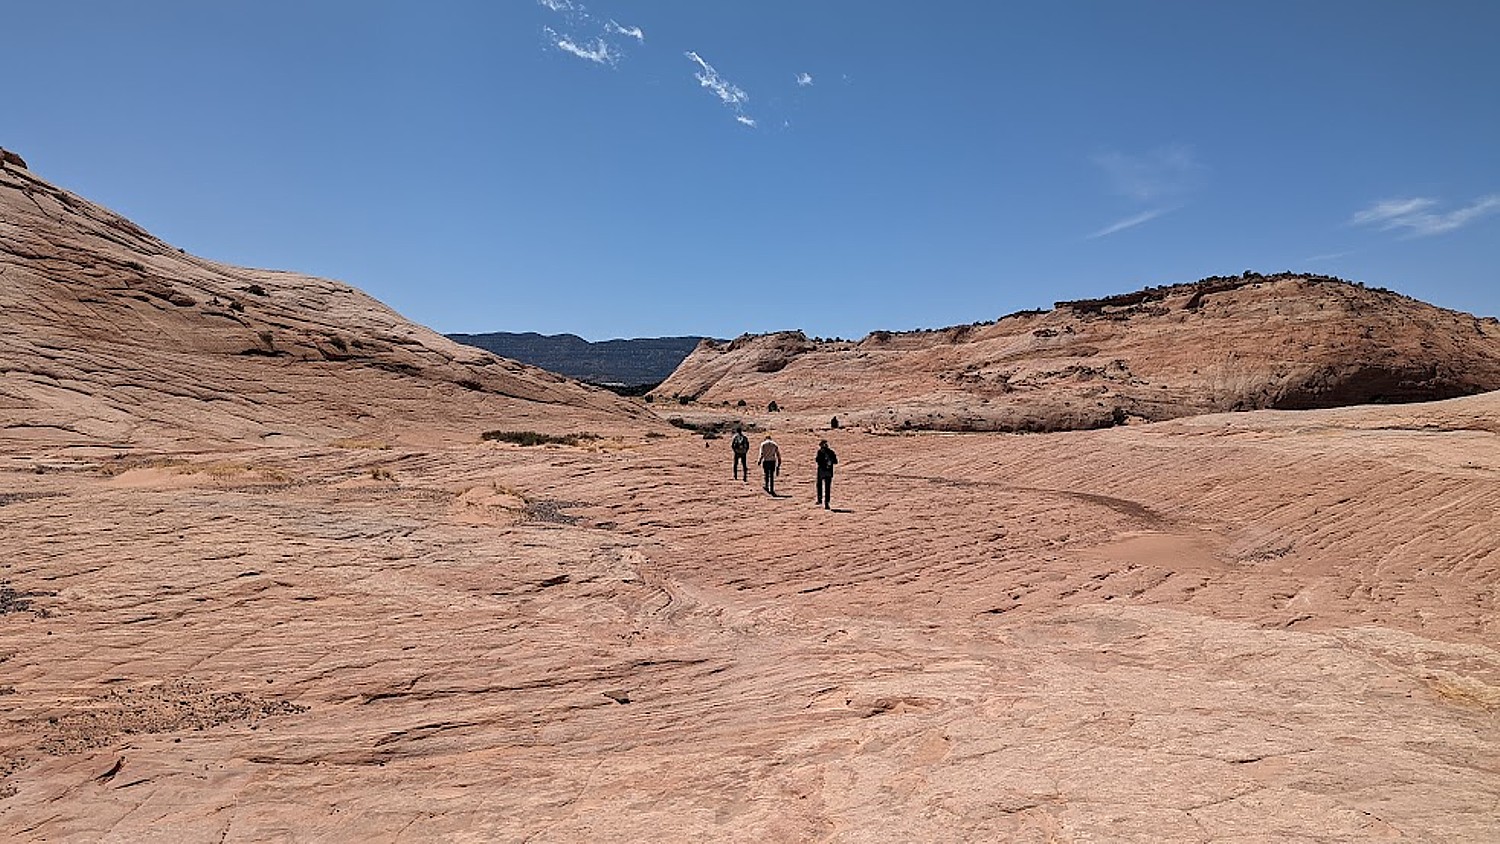
This first morning, we hike to the Zebra Canyon – a slot canyon which is often too flooded to visit, as it was when Laini and David were last here. It’s a two-mile hike across flat open terrain to get to the entrance (virtually no shade).
Laini reads notes to direct our route that sound like Indiana Jones navigating by looking out for cryptic descriptions of land formations.
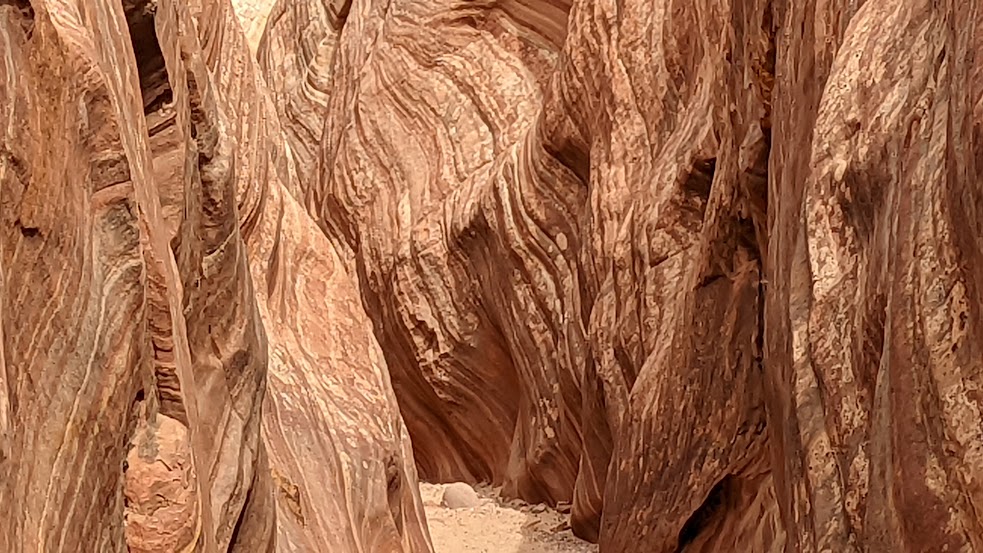
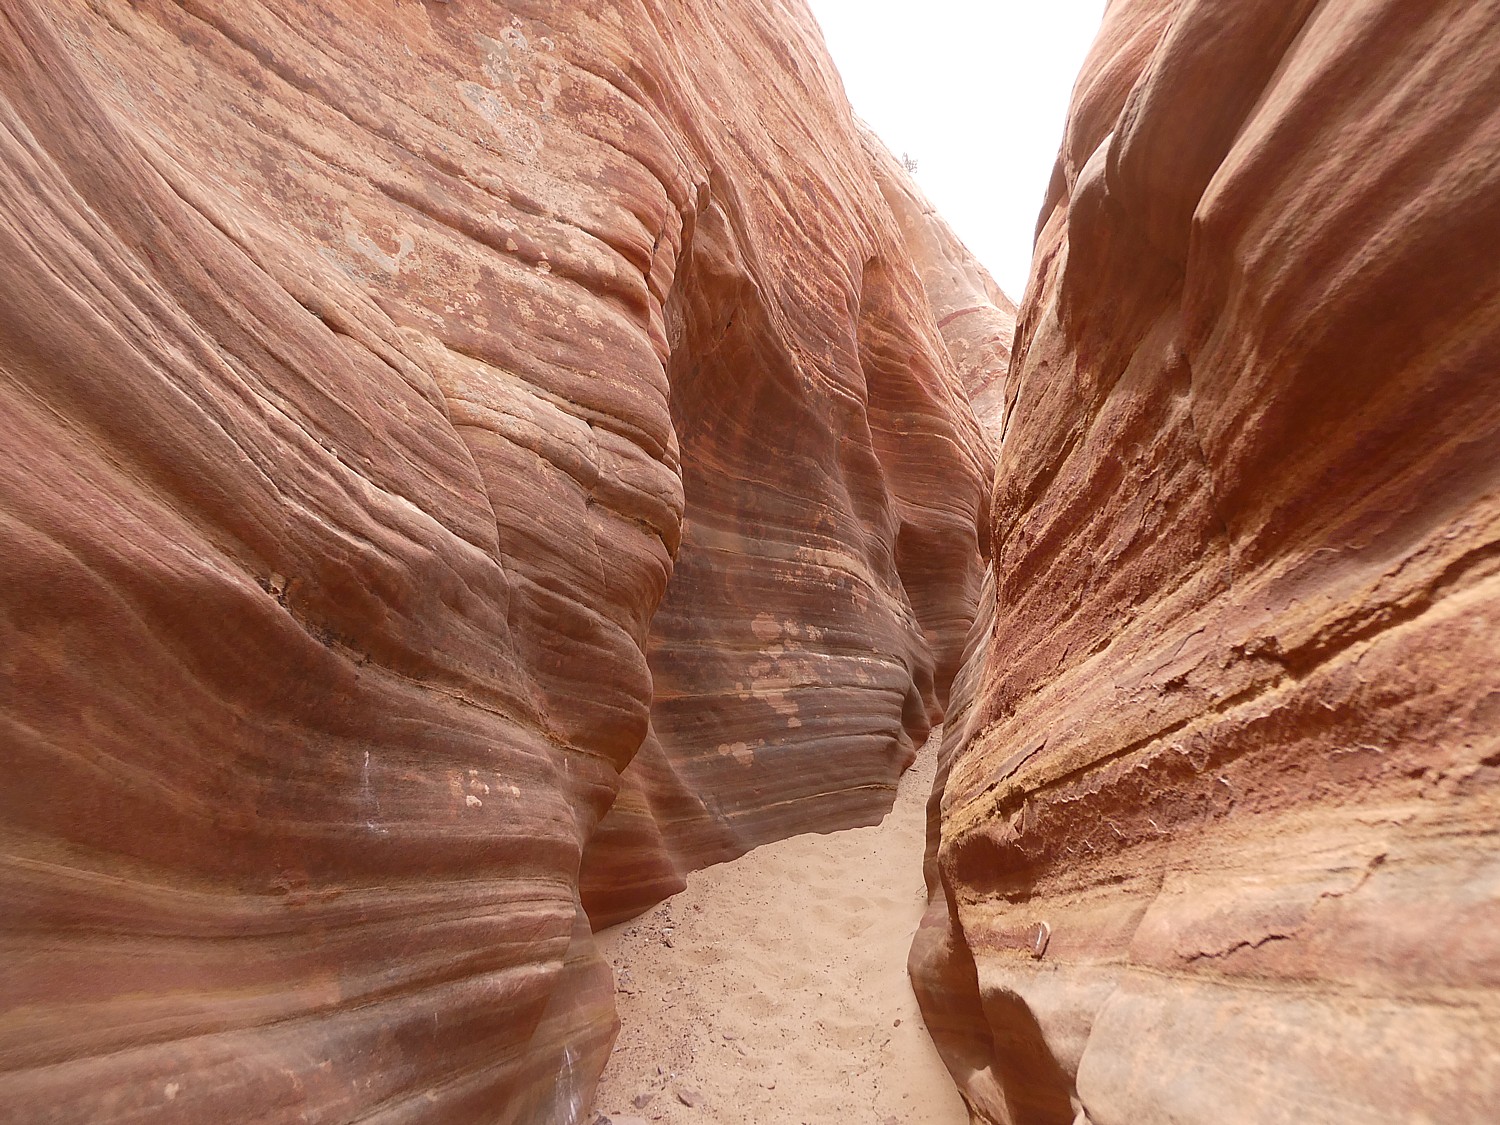
“Named after the vivid stripes that line its walls, Zebra Slot Canyon in Grand Staircase Escalante is perhaps the most unique canyon in Southern Utah,” the notes read. “To reach the stunning canyon requires an 8-mile drive down a dirt road, a 5-mile round trip hike that can be tricky to follow, and a challenging climb through very narrow canyon walls. Even though the Zebra Slot Canyon itself is only about a quarter-mile long, the long journey to reach it is completely worth the effort.”
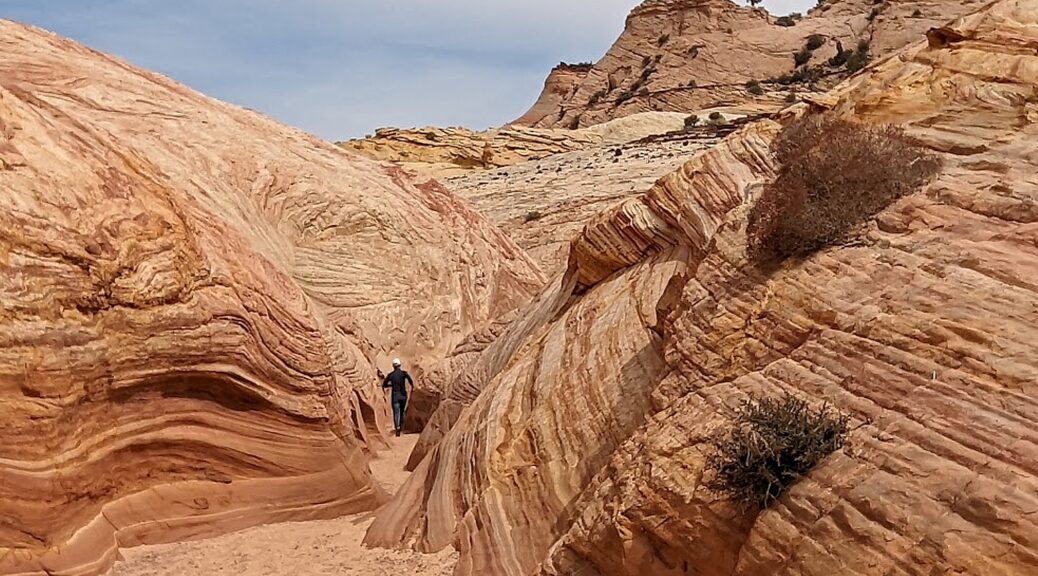
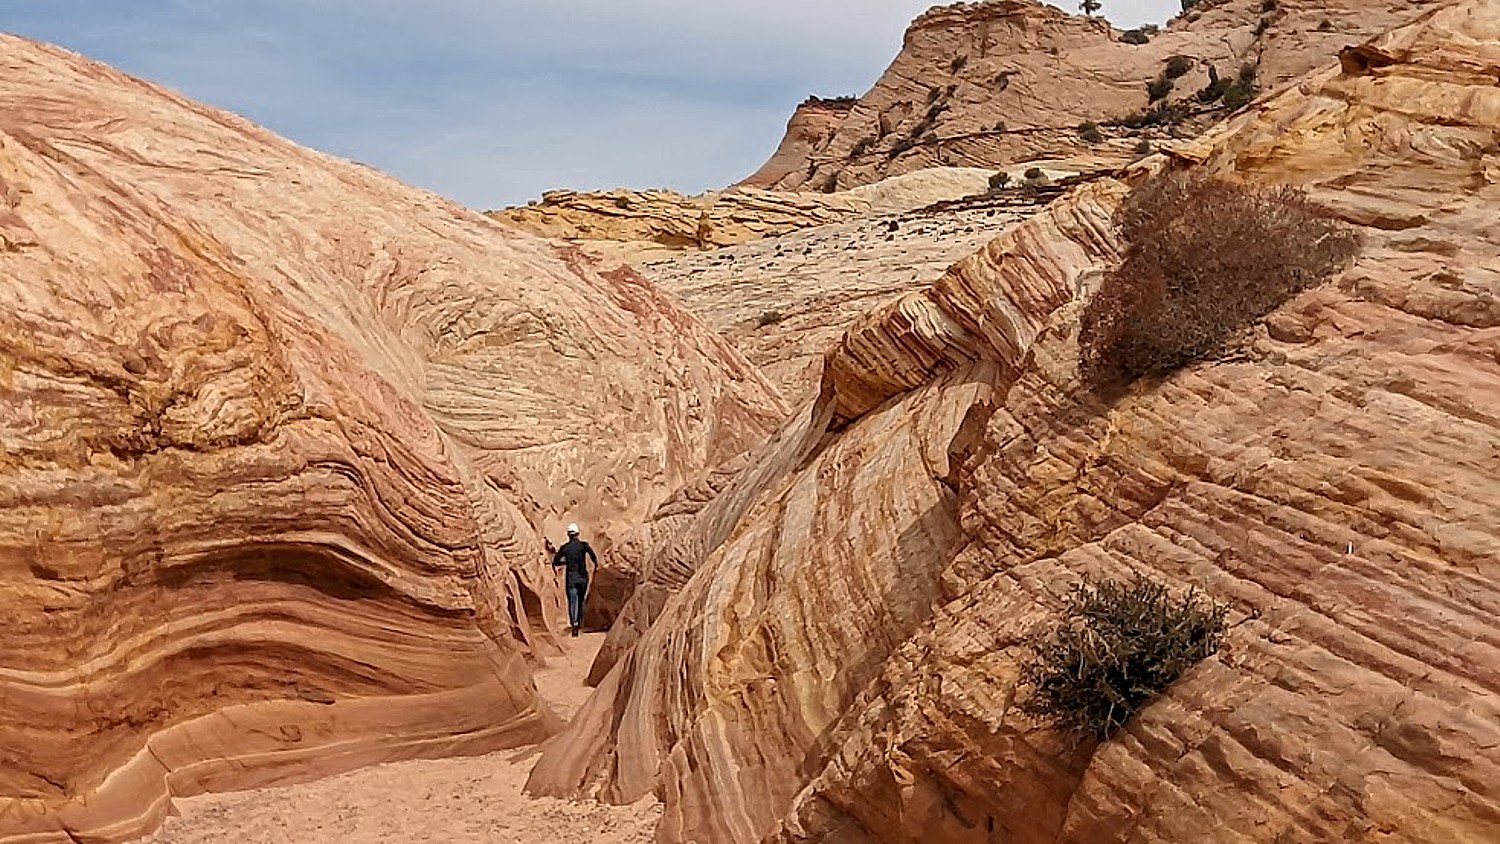
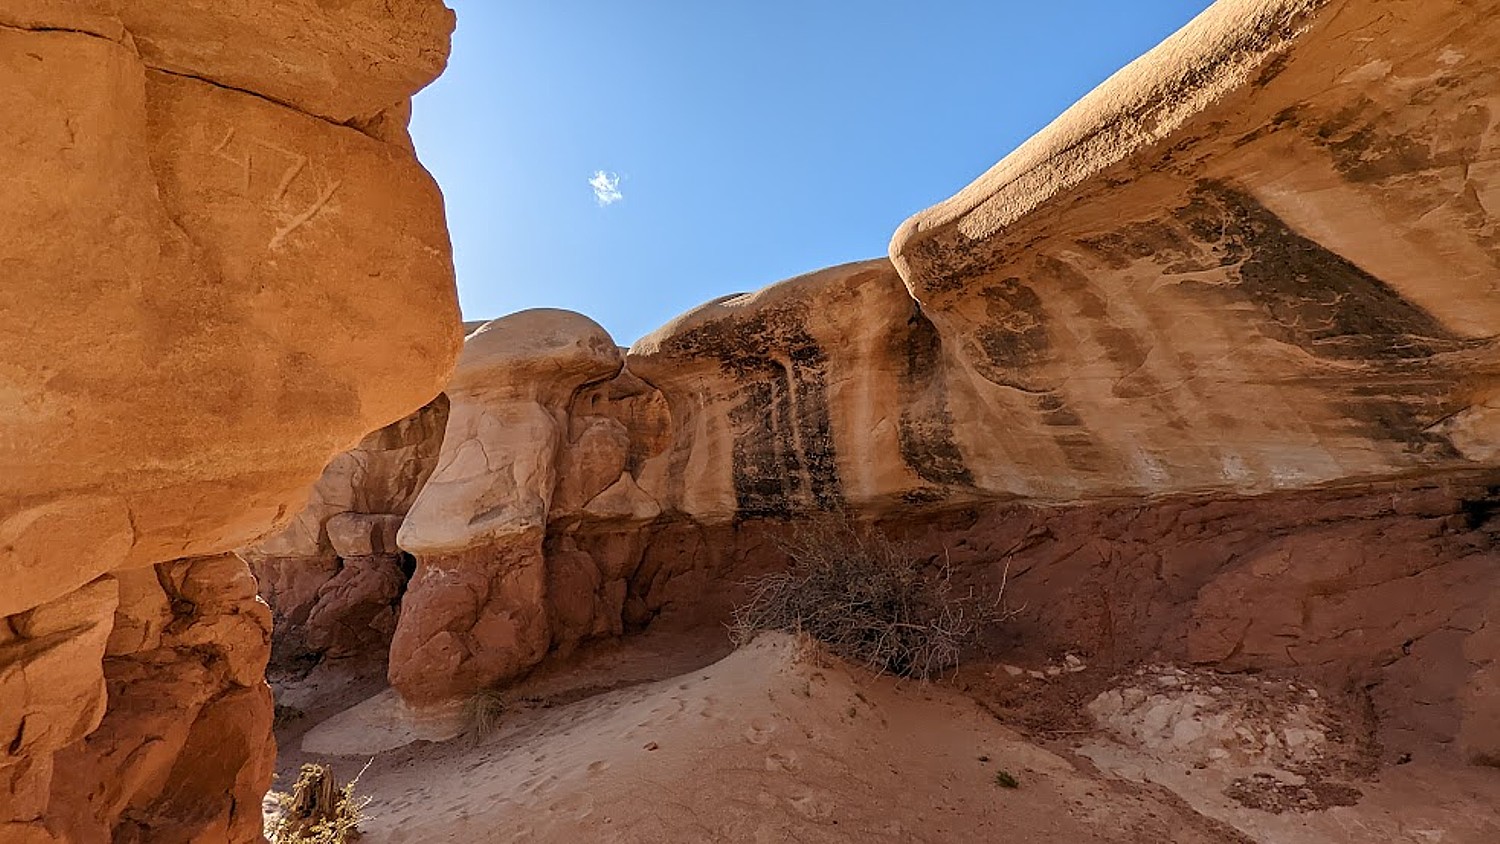
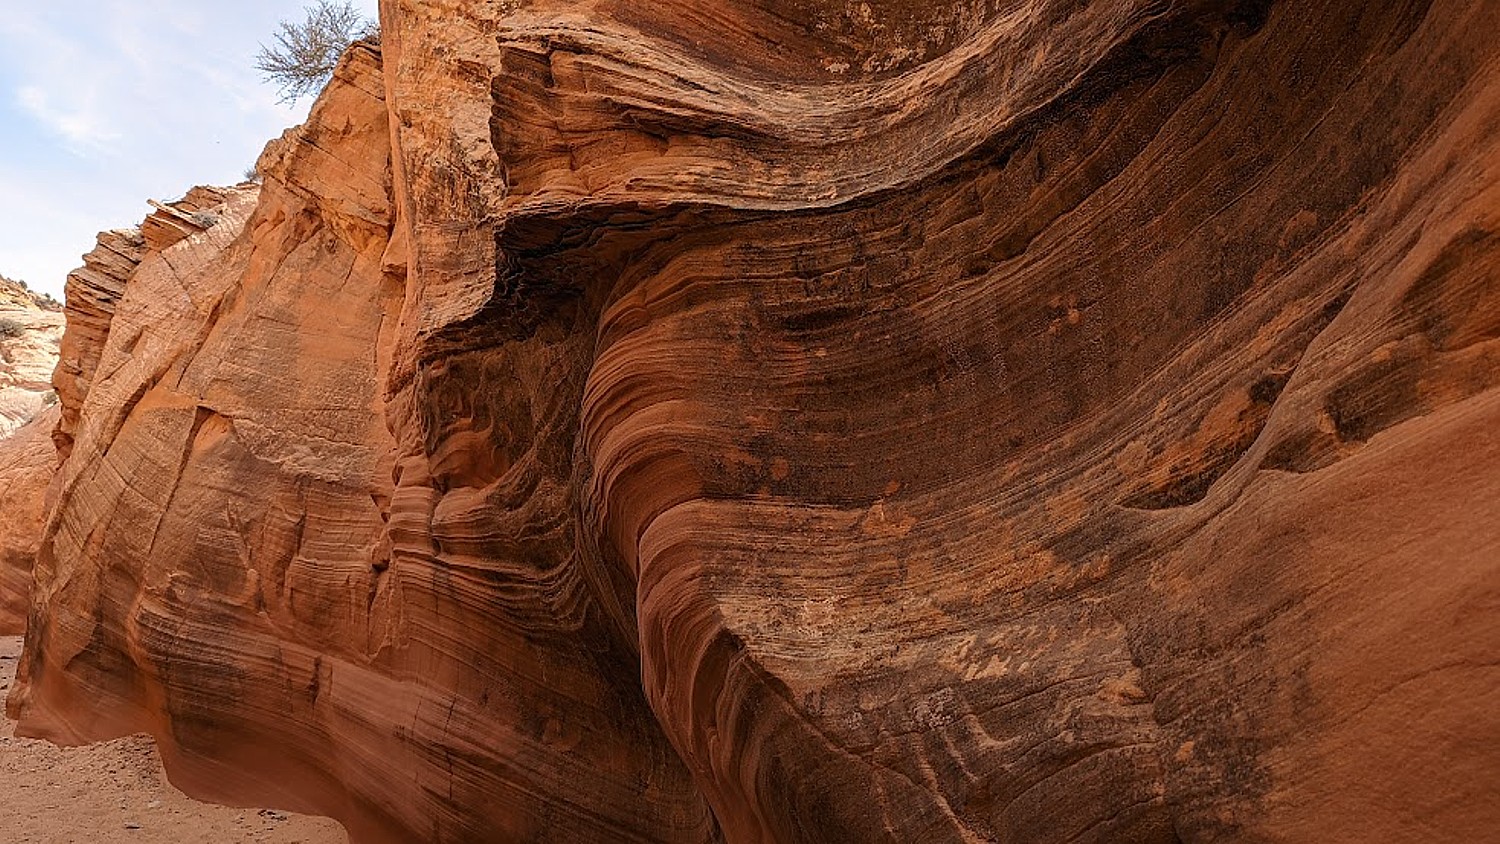
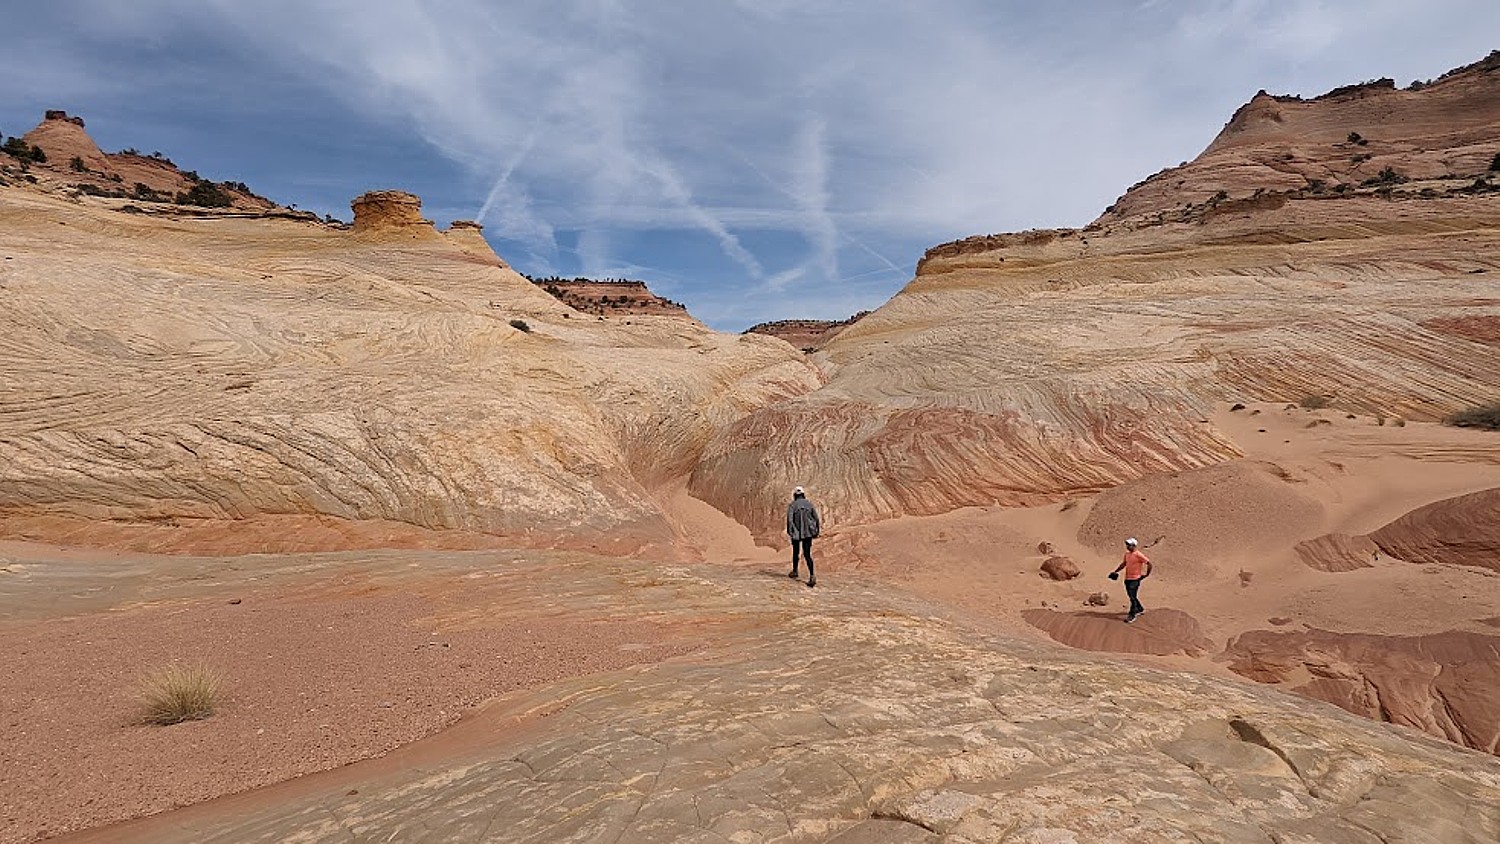
The landscape here in the Grand Staircase Escalante is so different from Capitol Reef – swirls and folds, amazing color, the formations sensuous.
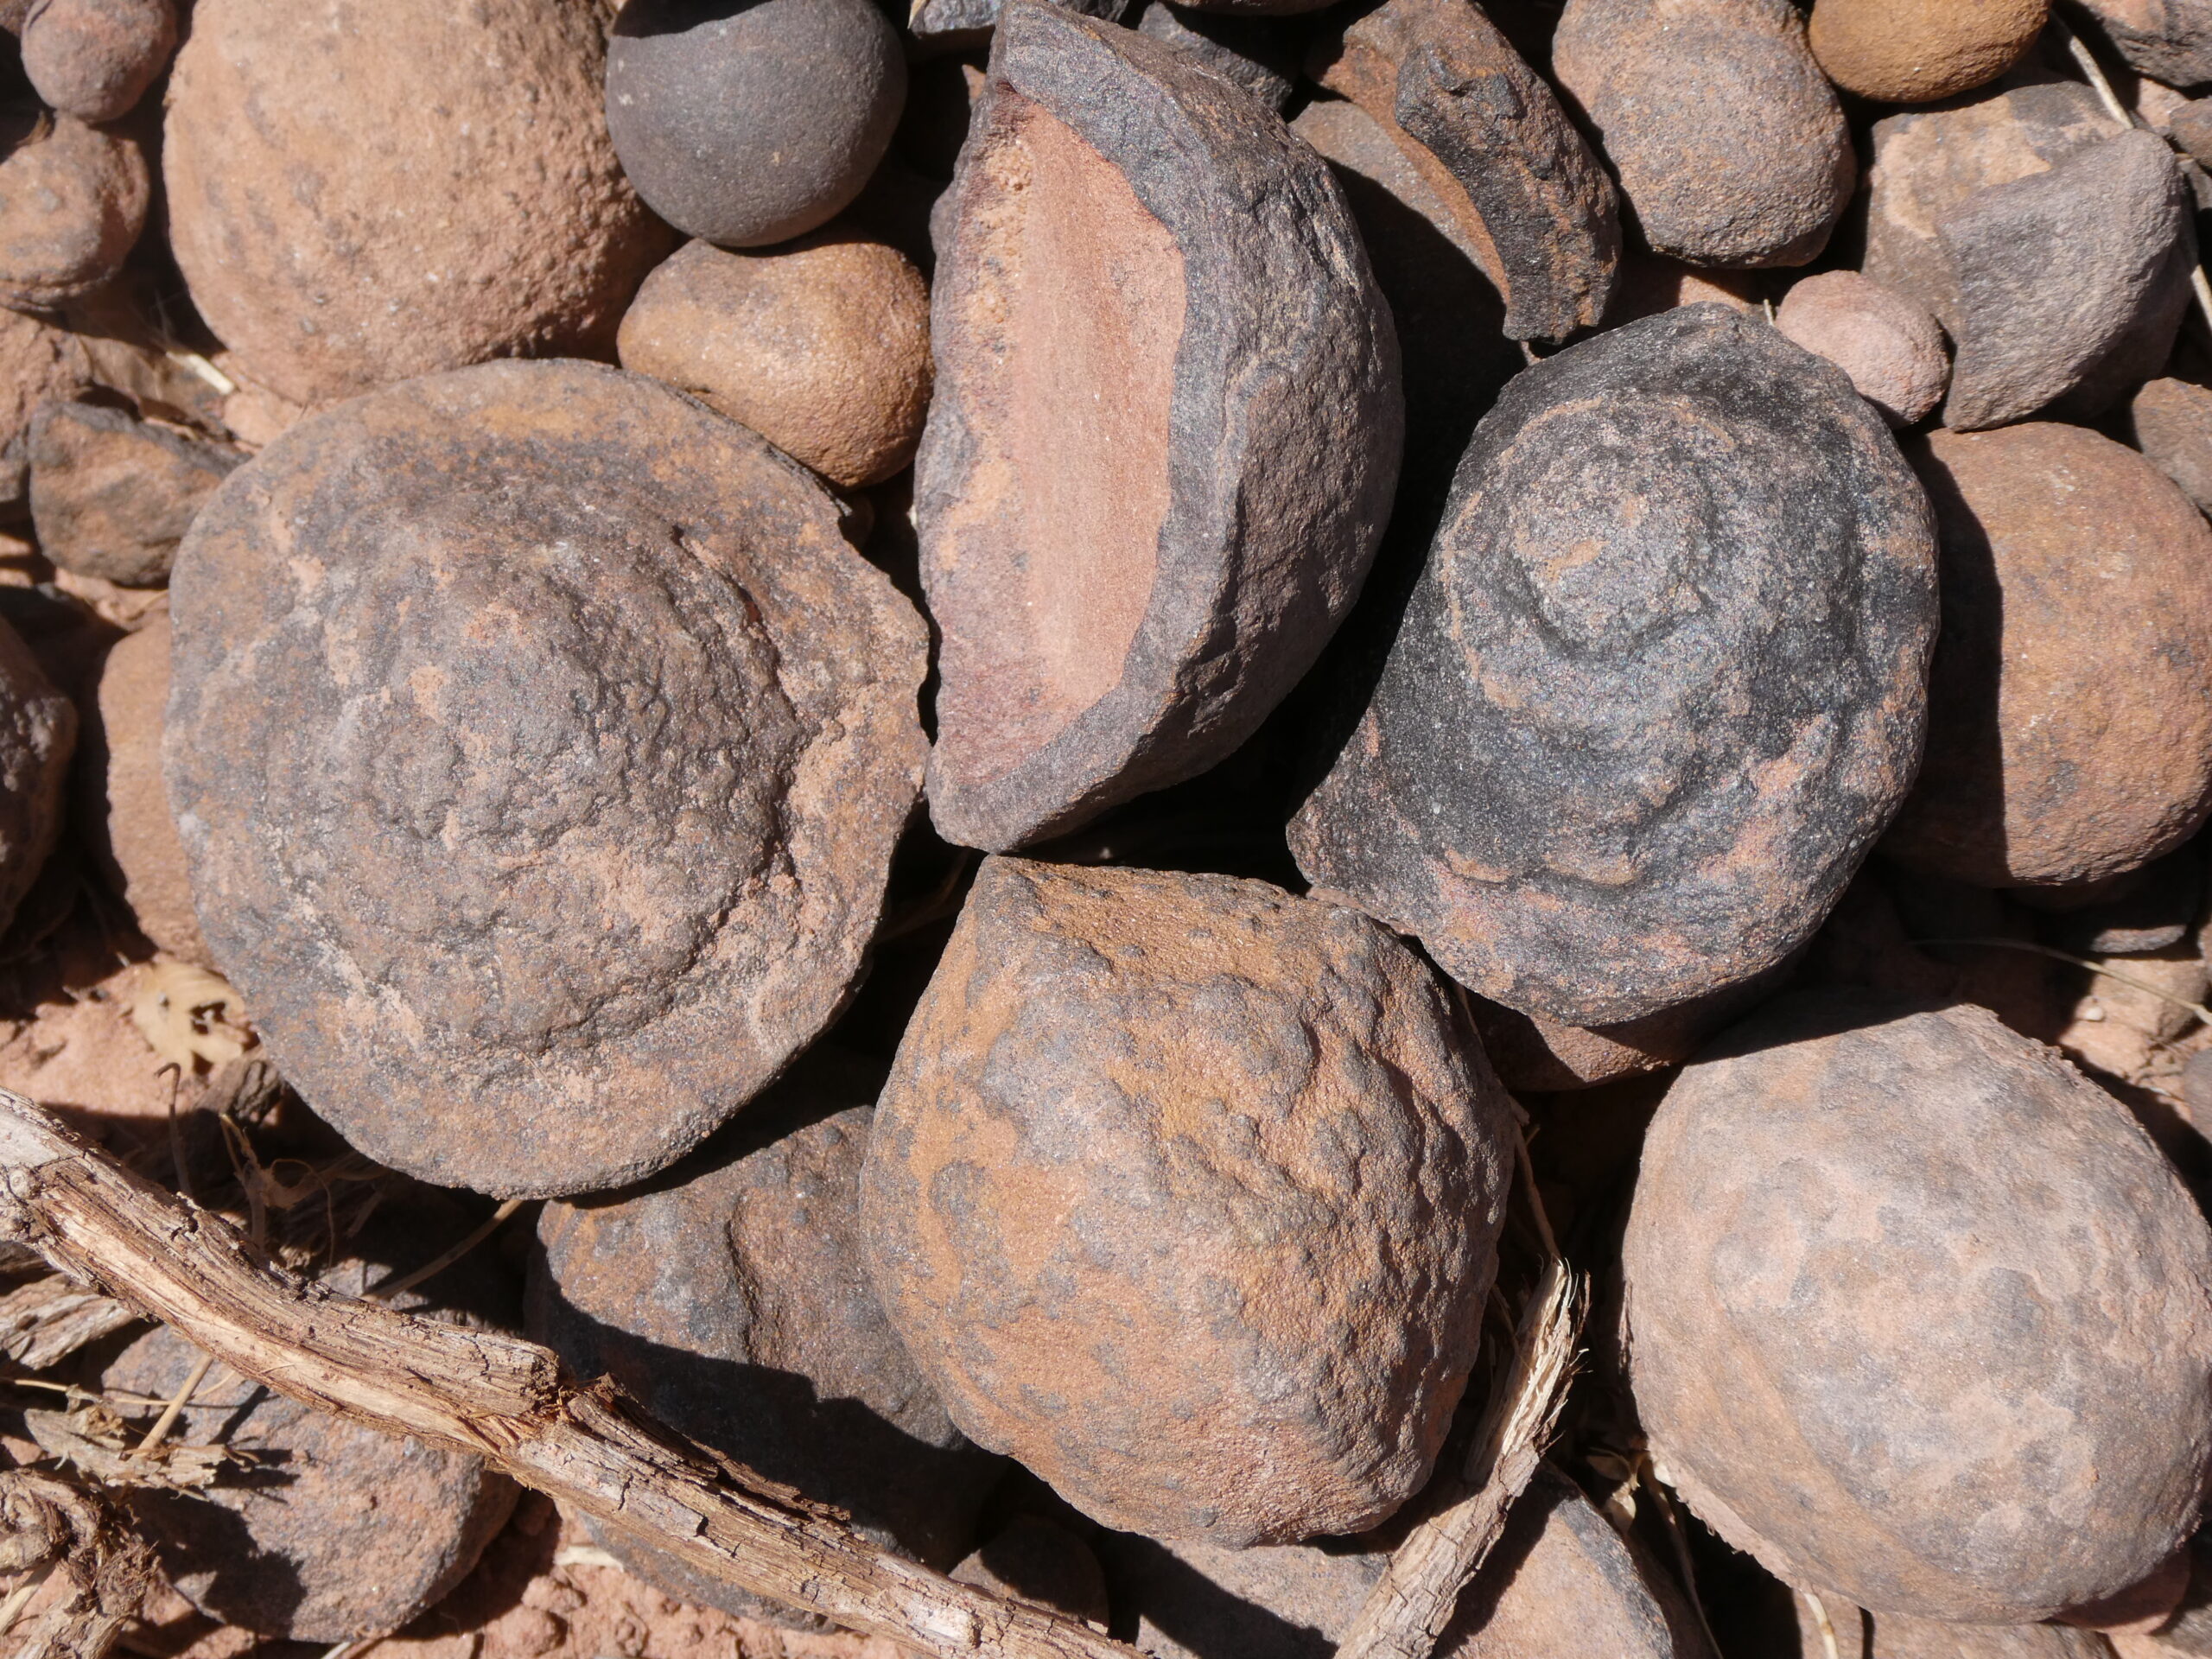
We come upon a literal pile of perfectly round rocks (“Moqui marbles”)—that look like chocolate bon bons or rubber balls formed by hand–that native peoples used like marbles or balls.
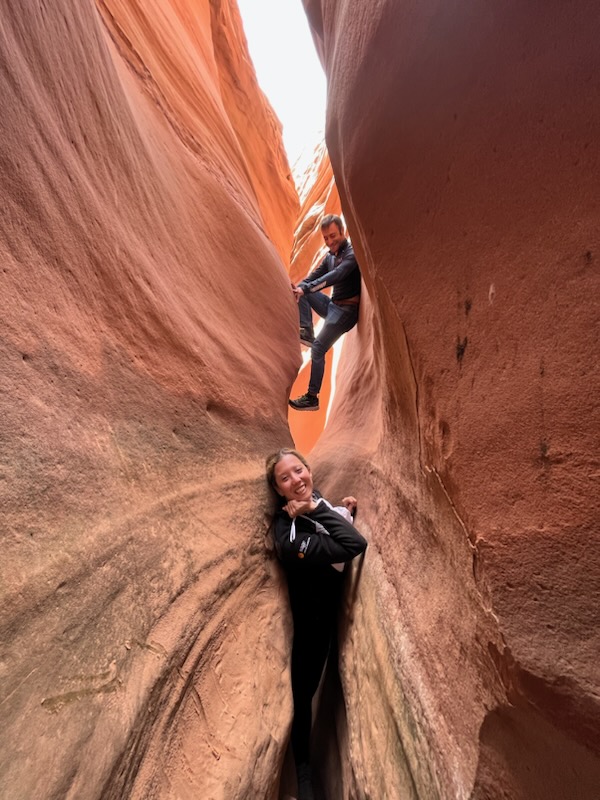
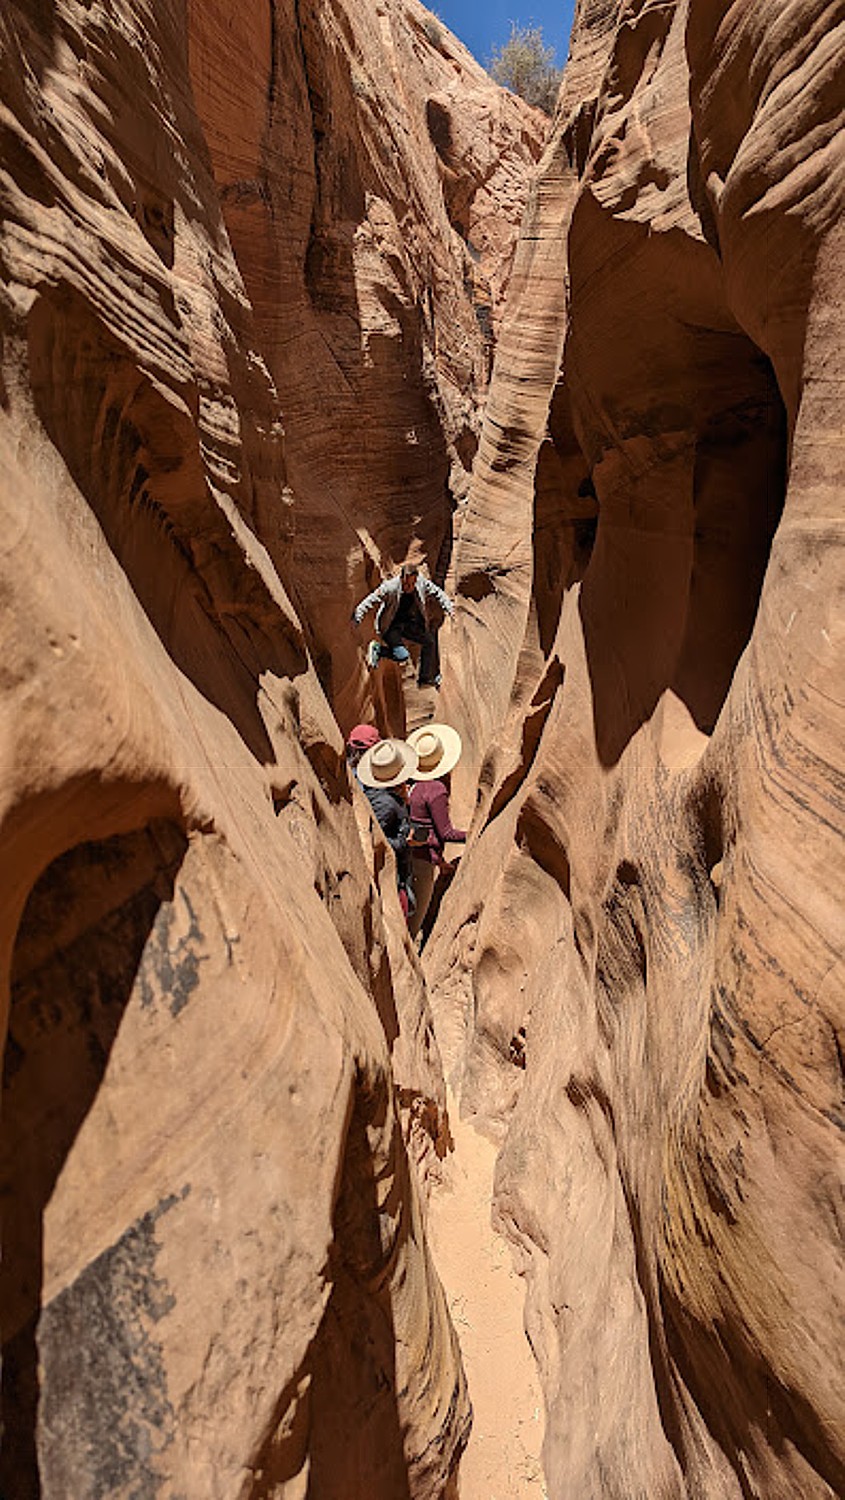
Zebra Canyon is wide open where it joins Harris Wash, but within 10 minutes, becomes deeper and narrower. Where it narrows, there can be a few pools of water from ankle to waist deep (you may want to take off your boots, but keep them with you); “15 minutes up the canyon you enter the short, but amazing Zebra section that ends at a small dryfall you can upclimb. This is the best section of Zebra. Above the small dryfall is a large pothole and the canyon opens. Head back down to Harris Wash when finished,“ the notes say.(www.roadtripryan.com/go/t/utah/escalante/zebratunnel)
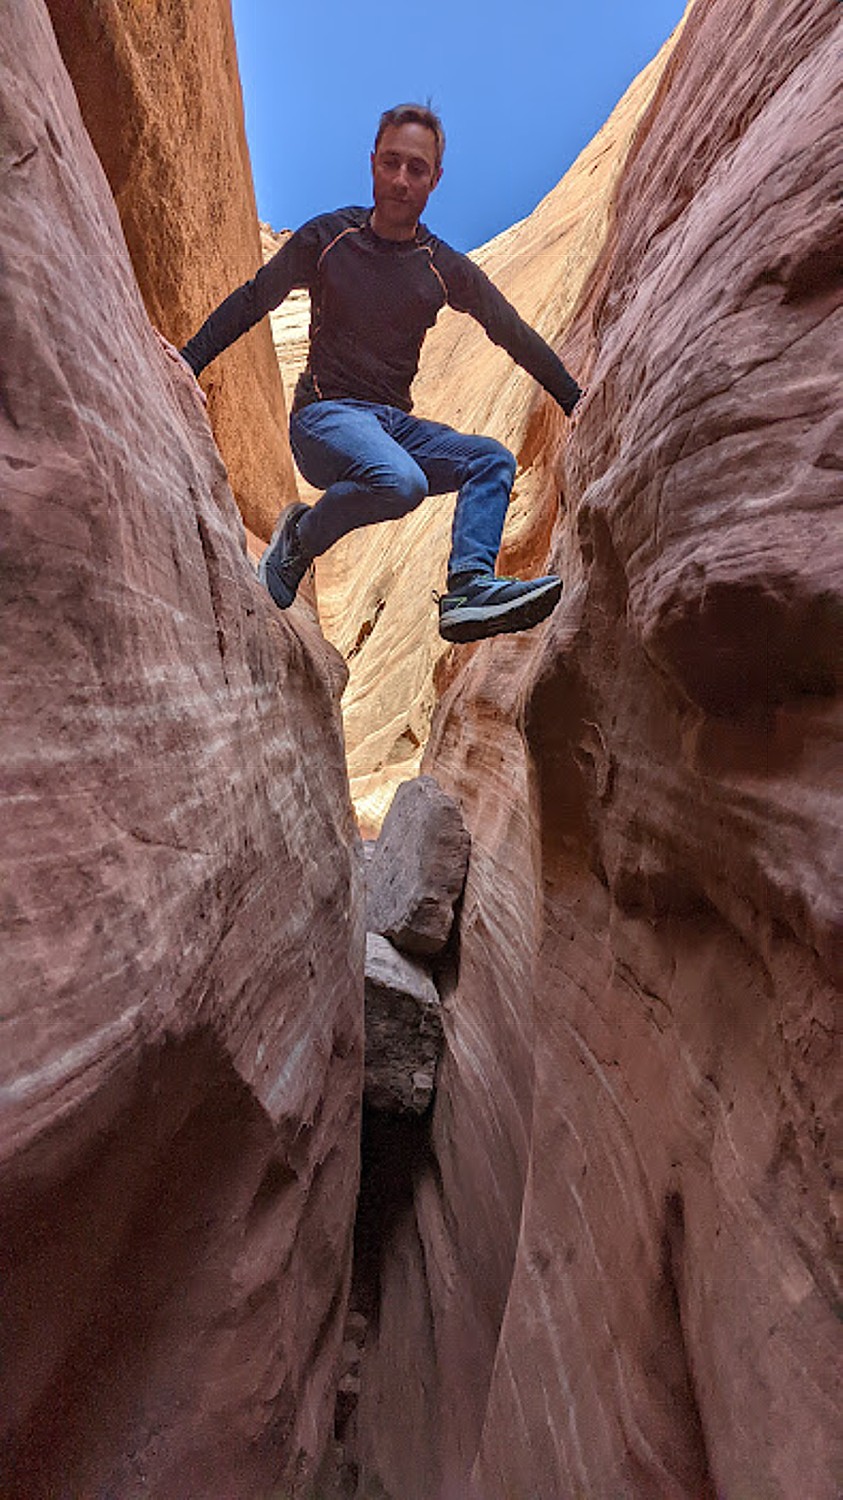
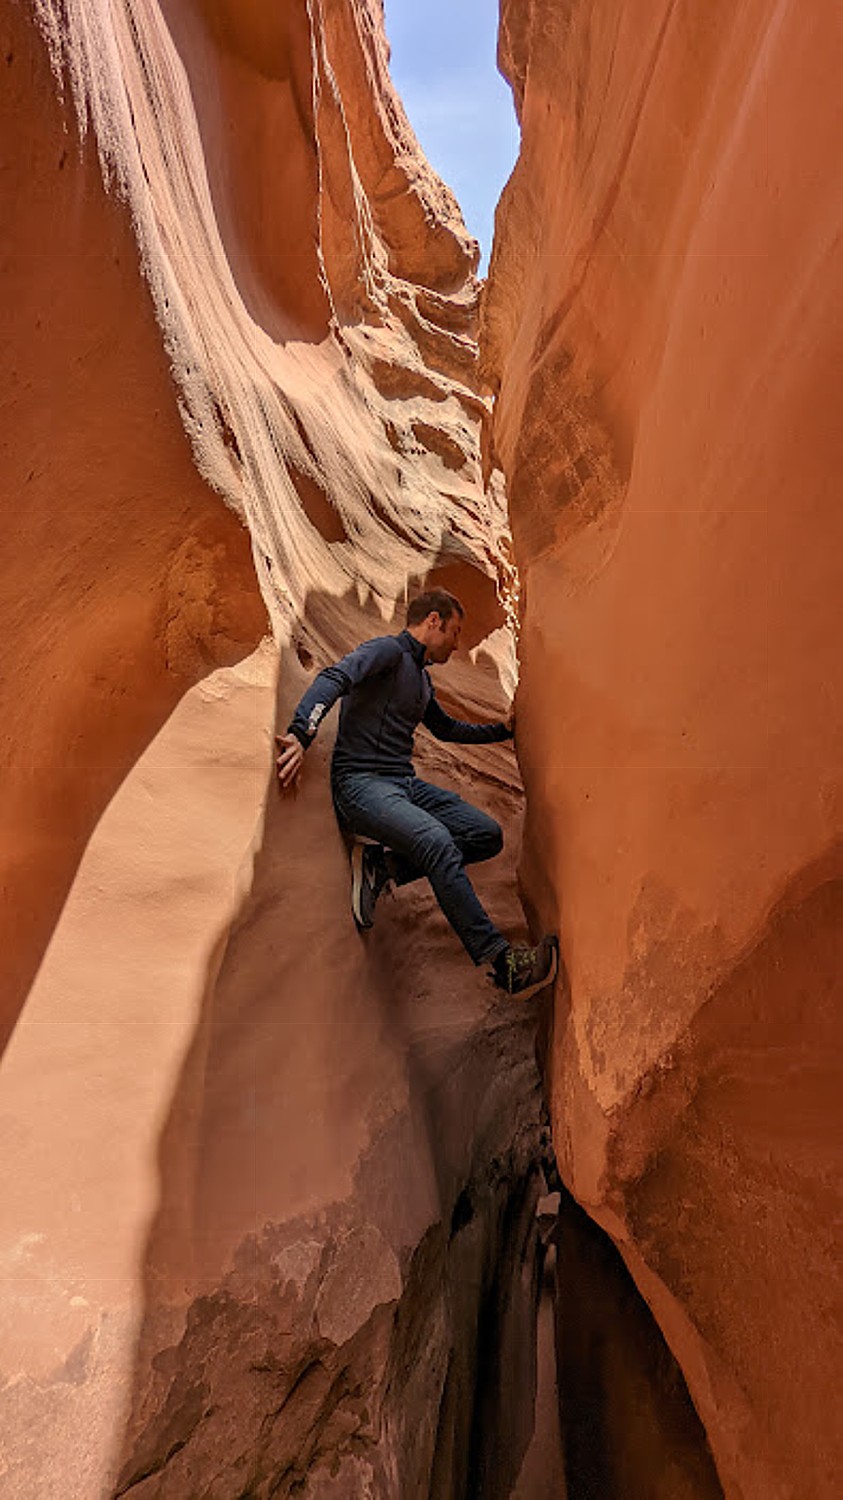
I make it through a little ways, squeezing my way in, but then it becomes even narrower, with barely 10 inches to get through. This is much more technical, requiring real climbing skill, where you have to use your hands and legs to shimmy up the walls of the canyon and slither through. Essentially, every “step” is problem-solving a puzzle – involving seeing the puzzle in its full-dimension, thinking out of the box to use all your resources, and transfigure/manipulate/reshape your body. You need to be flexible (I’m not), have good strength in your upper body, hands and knees (I don’t), and it helps to be thin (no comment).
This is my first experience in a slot canyon, and I am intimidated. I don’t want to hold back the others or have them worry that I will be completely trapped inside (my worry), so I tell them to go on ahead and wait for them in a small wider section, enjoying watching others go through (and not return).

It feels surreal, but I can hear people laughing through the rock walls, as if embedded in the rock (it’s weird). While I wait, I watch the various techniques people use to scramble up the sides and solve the problem of slithering through. Very creative! (I’m sorry to have missed the experience but I did not want David and Laini to be concerned for me.)
Our plan is to next go to Tunnel Slot. The directions say to go down Harris Wash a little less than a mile (20-30 minutes) from Zebra to the first side canyon coming in on the left. Go up this side canyon about 10 minutes to reach the Tunnel. It can be dry, or a deep pool.
But instead of exiting to the other end of Zebra where I would expect these directions apply, David, Laini and Alli come back to where I am at the beginning, and we continue on in search of the Tunnel Slot Canyon that is supposed to be nearby.
Canyons don’t have signs or markers. People just know where to go. In some instances we find cairns (a marker made of piled-up rocks that leads you to the right path. I keep that in mind to throw back at bigots who have turned my name, Karen, into a slur: cairns lead the way to the right path).
But mostly, we just go (a tad unnerving because of the vastness of emptiness and the thought of actually wandering around totally lost, as I’ve seen in Survivor and/or Disaster movies).
Laini recalls another of Ace’s sagacious aphorisms, “Whichever way you go, that’s the best way.”
So, we find ourselves paving our own trail (that’s fun too) , walking over a vast section of slickrock – amazing white, swirled smooth mounds of rock like petrified ice cream – and instead find another slot to explore. This time, I scramble over boulders to get in (very proud of myself), but it doesn’t go far. Still. I did it and it gives me confidence for another day. We don’t actually find the Tunnel Slot Canyon.
We find our way to the trail we came in on (whew!), and return to the trailhead.
We’re back to the Jeep by 4:10 pm, having hiked for 6 hours (6 miles).
There are more slot canyons in this region of Utah than anywhere in North America, Laini says. (See: Top 10 Slot Canyons in Utah, https://www.utah.com/articles/post/top-10-slot-canyons-in-utah/)
The slots are reached along Hole in the Rock Road. And after these ambitious hikes, we continue driving on the road to Devils Garden, 13 miles south of Escalante
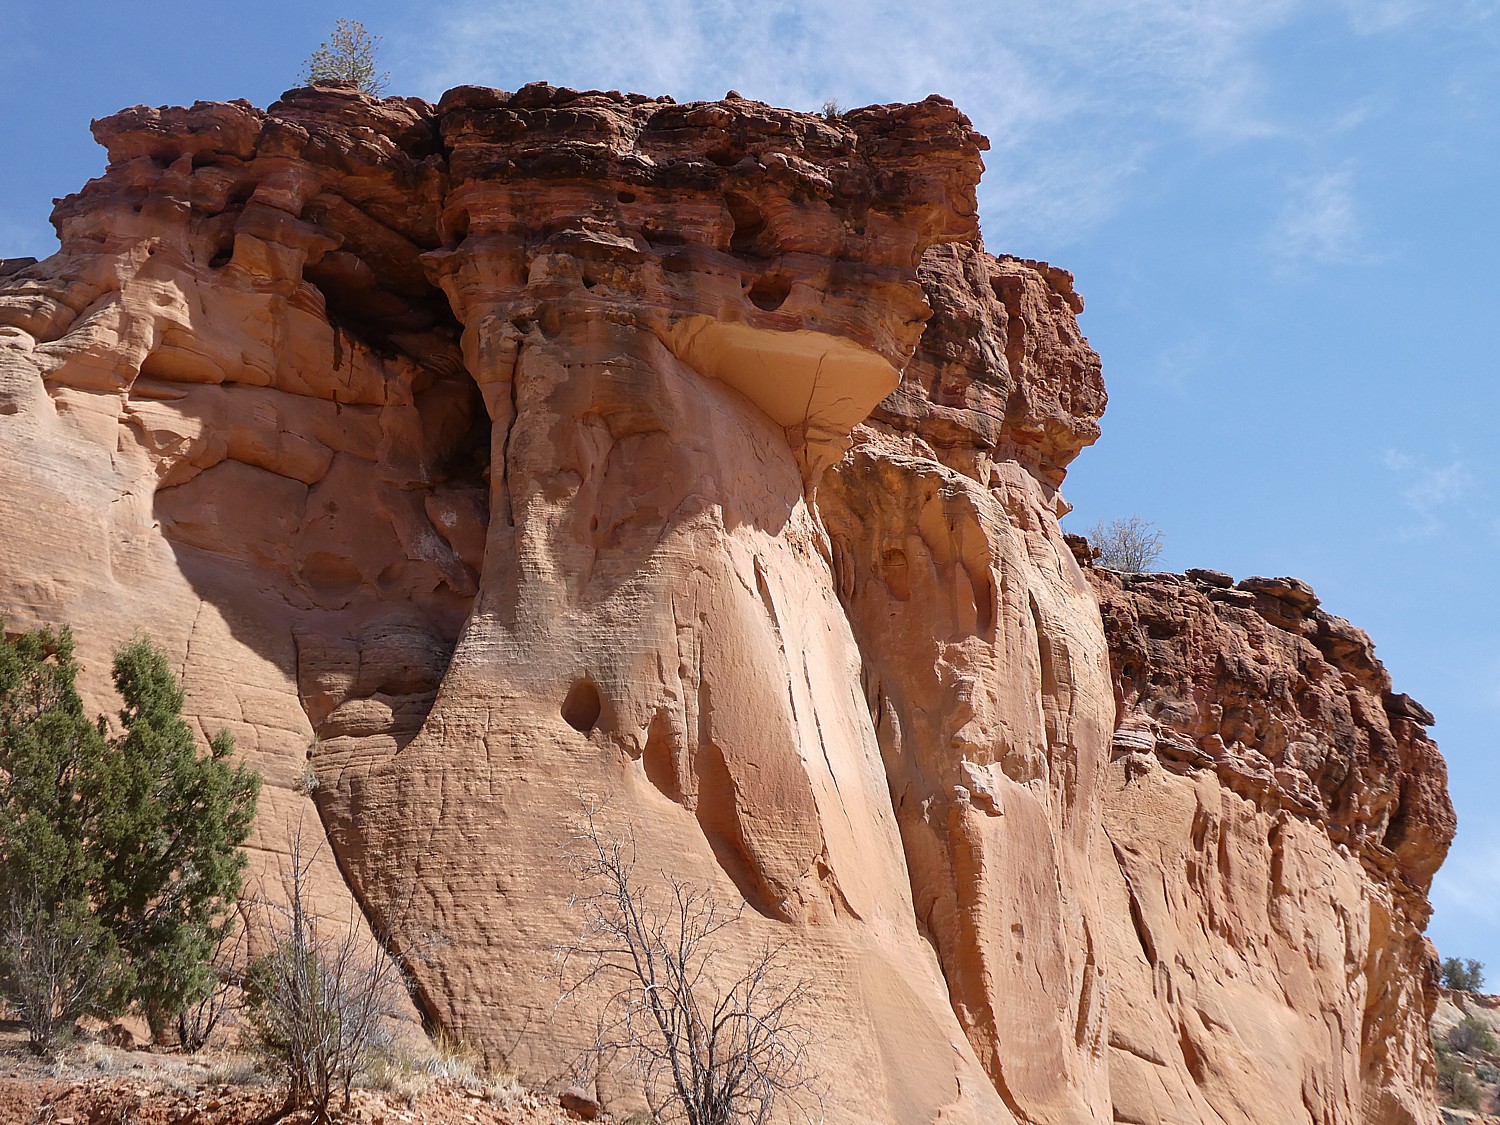
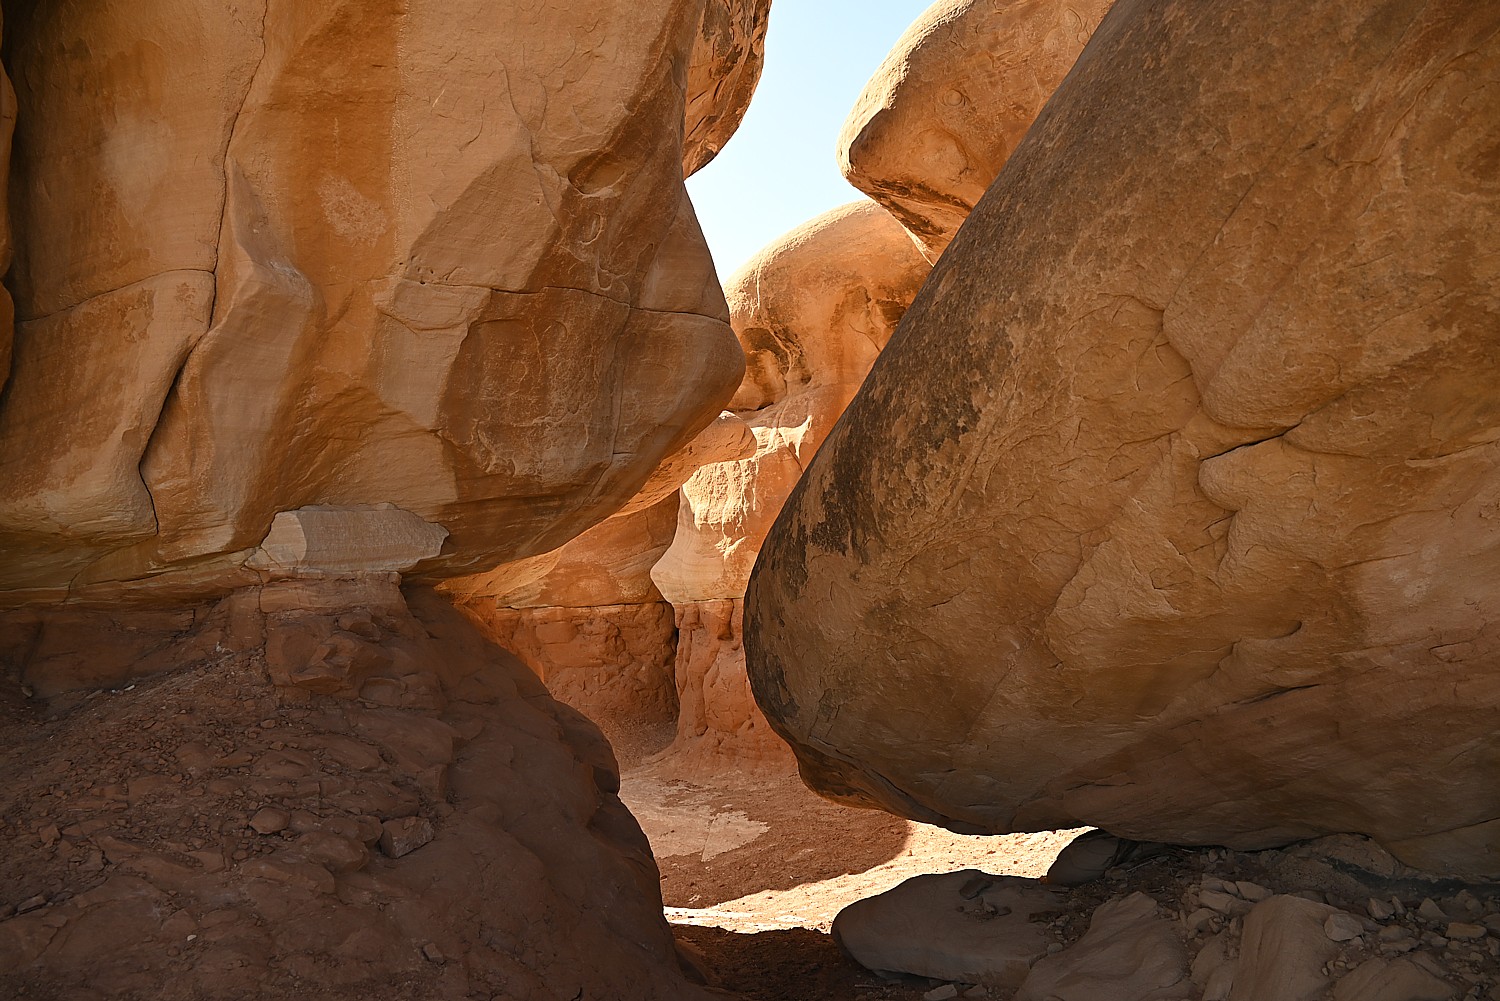
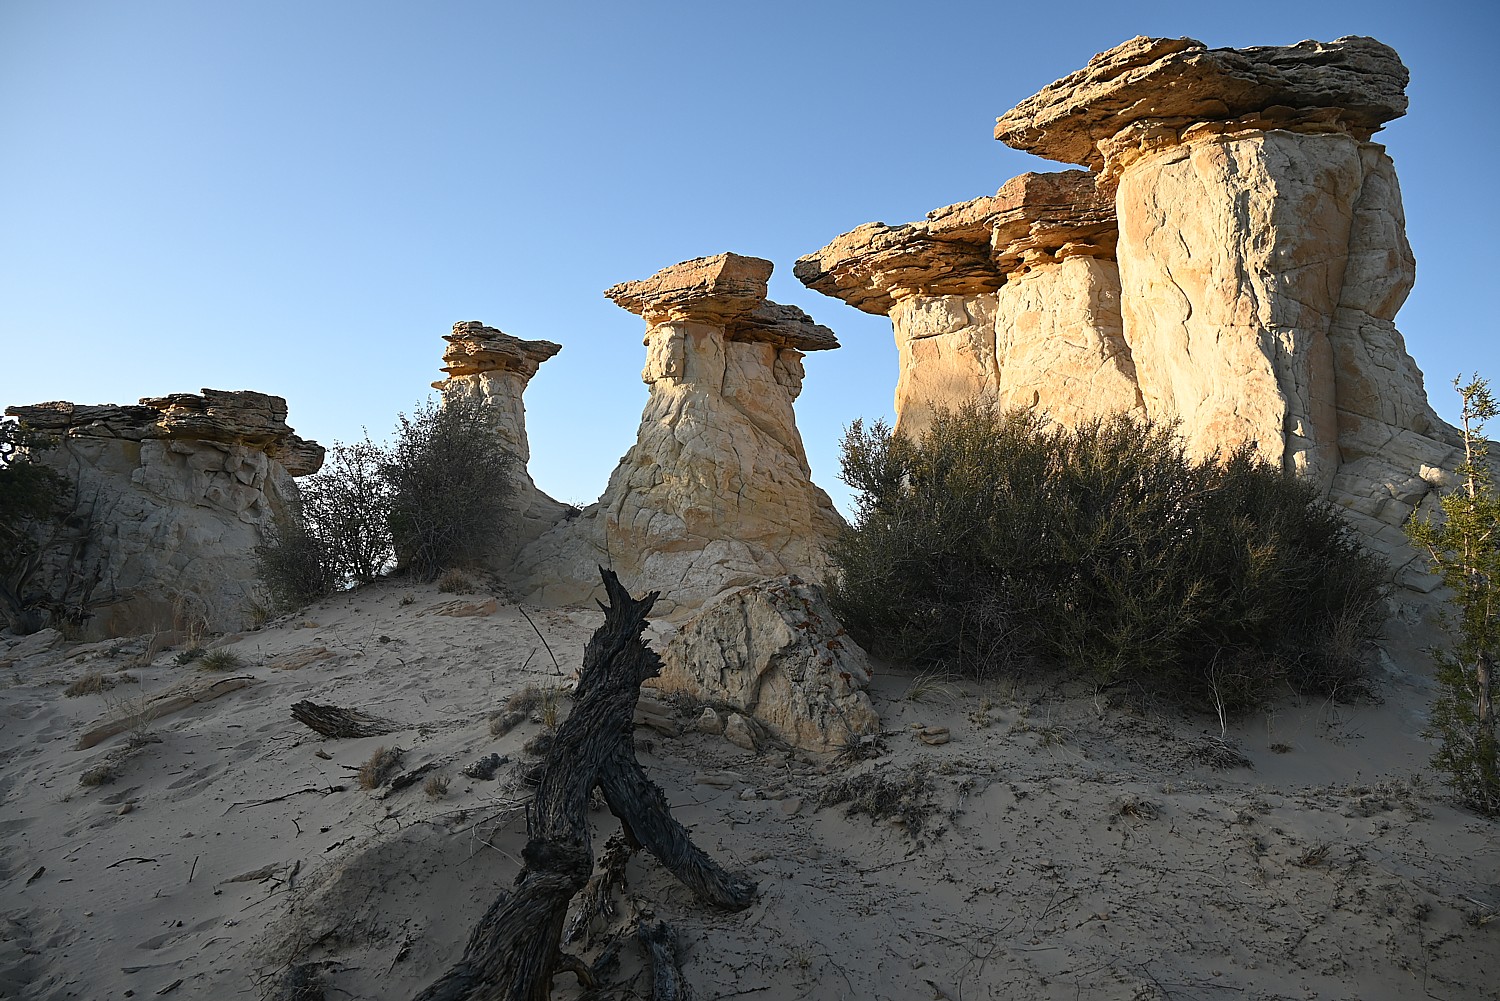
Devils Garden is an astonishing sight – a whole cityscape of hoodoos and arches. These are incredibly dramatic, mysterious – not rock at all, but seem to be imbued with spirits (hence the name, no doubt). To me, this place evokes Easter Island (and I wonder if that’s how the Easter Island statues were actually formed – originally hoodoos that islanders then carved). How is this place not so famous that everyone knows about it and comes? Don’t miss the Metate Arch.
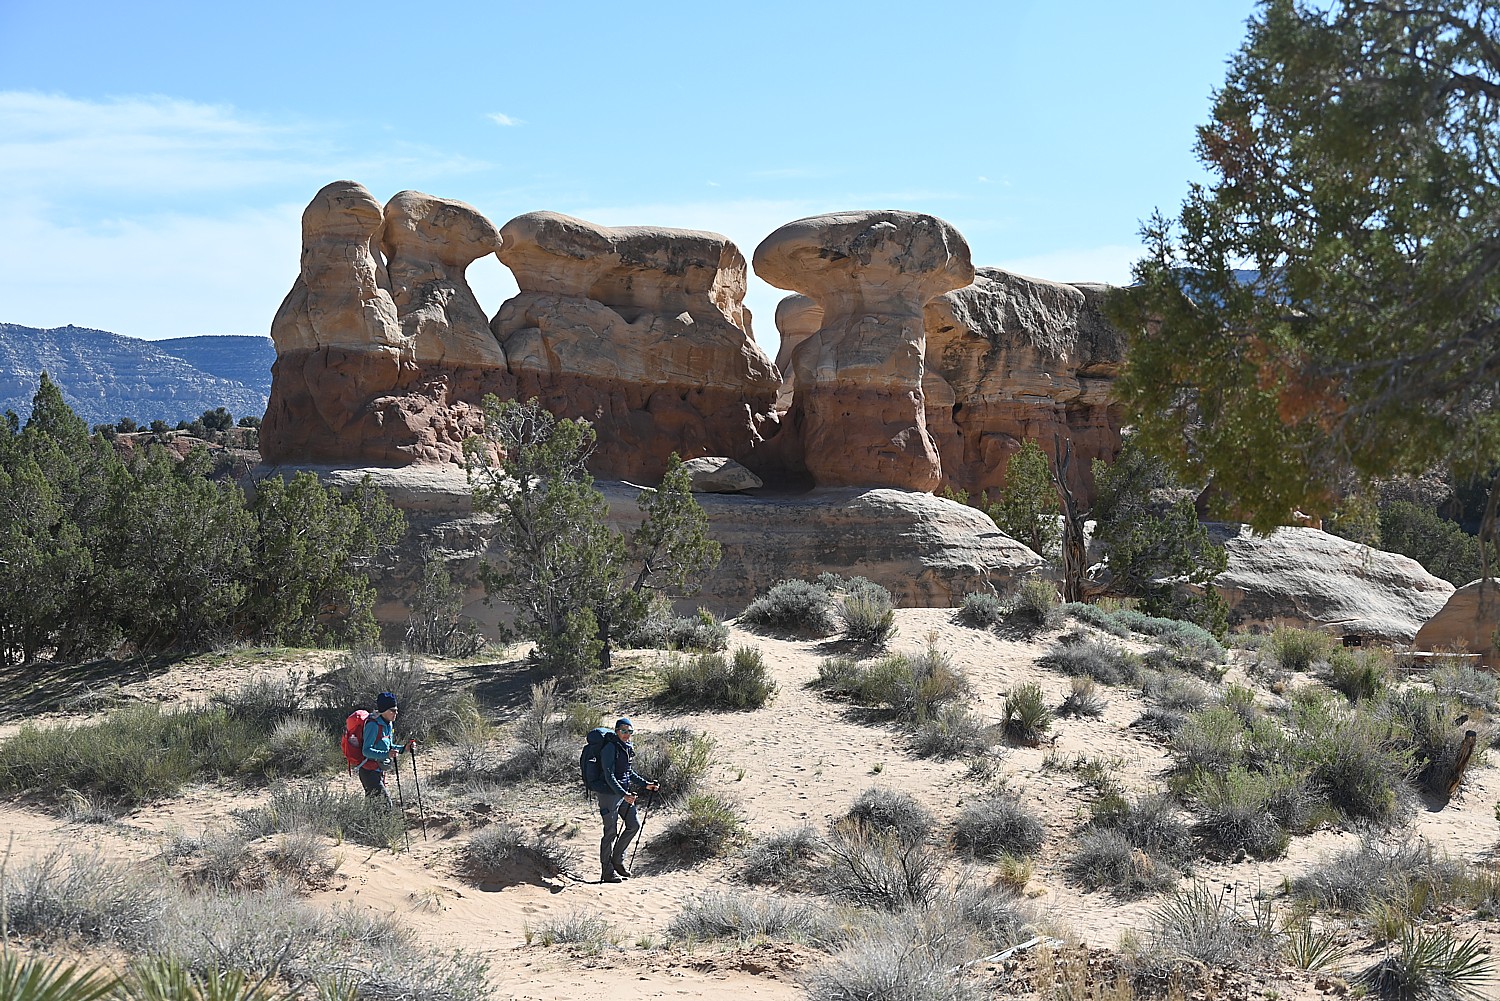

This is probably the easiest trail in the area, and is absolutely magical. There is also a lovely picnic area and bathrooms.
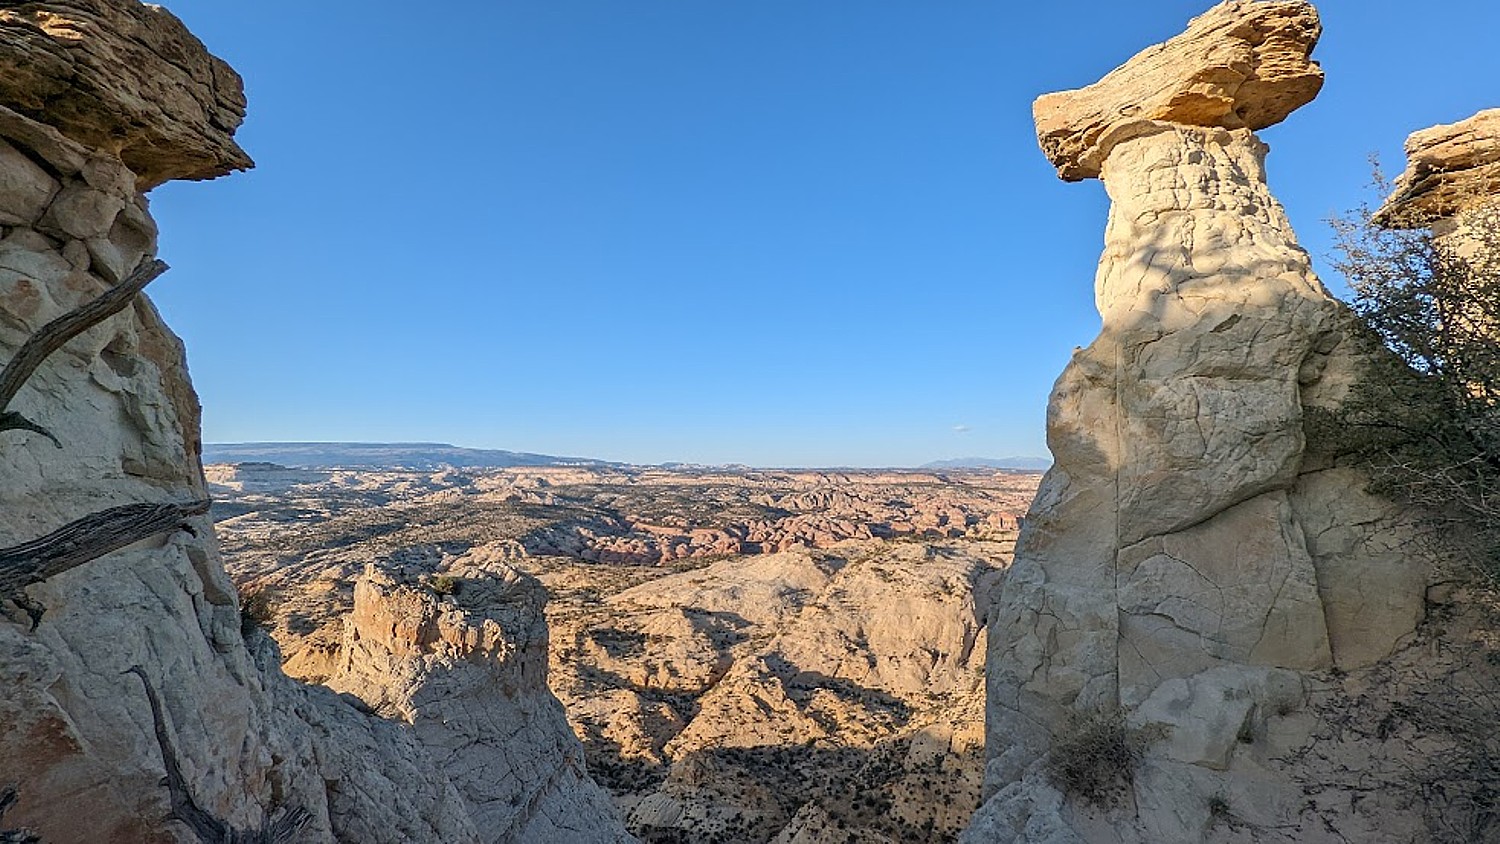
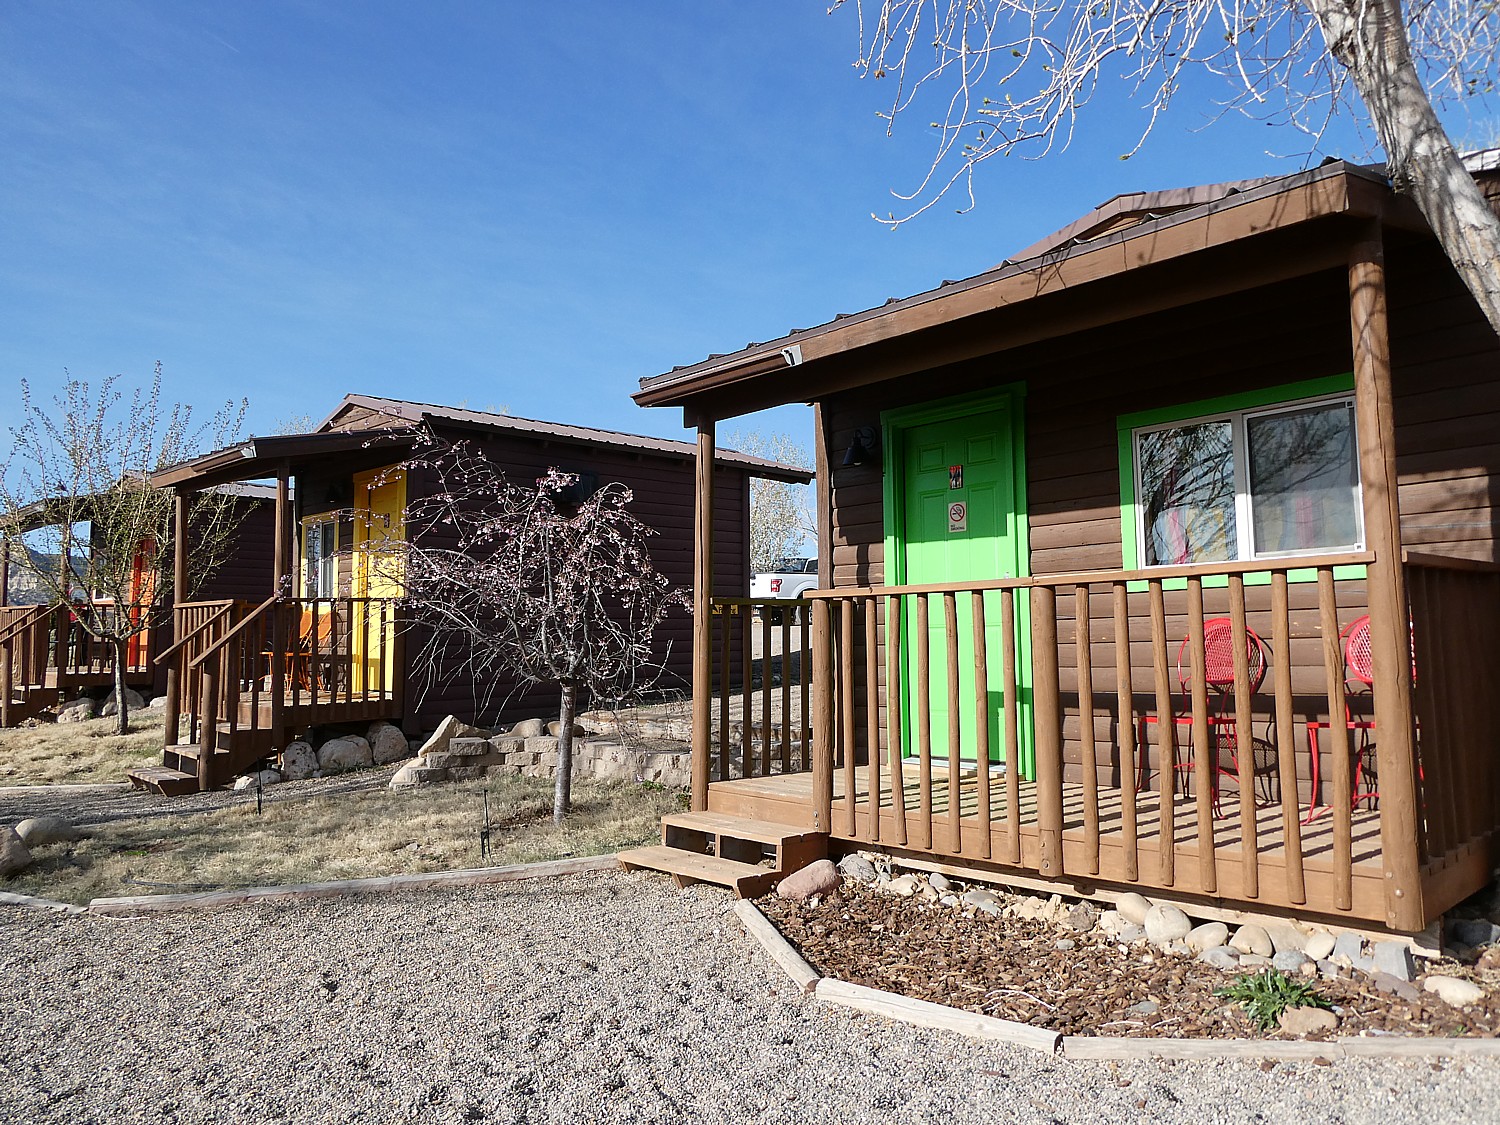
Back in the Jeep, Laini leads us down a wild path to the no-name hoodoos overlook that she and David discovered wild camping on a previous trip (the drive was harrowing enough, like being in an ATV). From this high elevation we look through these towering rock formations to the vast expanse below. It’s tempting to camp here, but we return to our cozy cabin at Canyons of Escalante RV Park in Escalante.
At the trailhead, we had met two “influencers” who seemed to us to be amateurs since they were not even carrying much water. We see them again in Zebra Canyon, where they were dressed incongruously in flowy blue dresses for a fashion shoot. At the end of the day, we happen upon them again at a restaurant adjacent to our campground, and learn they had completed Zebra, Tunnel, Spooky, and Pickaboo slot canyons all in one day!
Big Horn Canyon
For our second day exploring Grand Staircase-Escalante, we head to Big Horn Canyon.
I’m more prepared today for this hike and basically, go with the flow (as Ace would say).
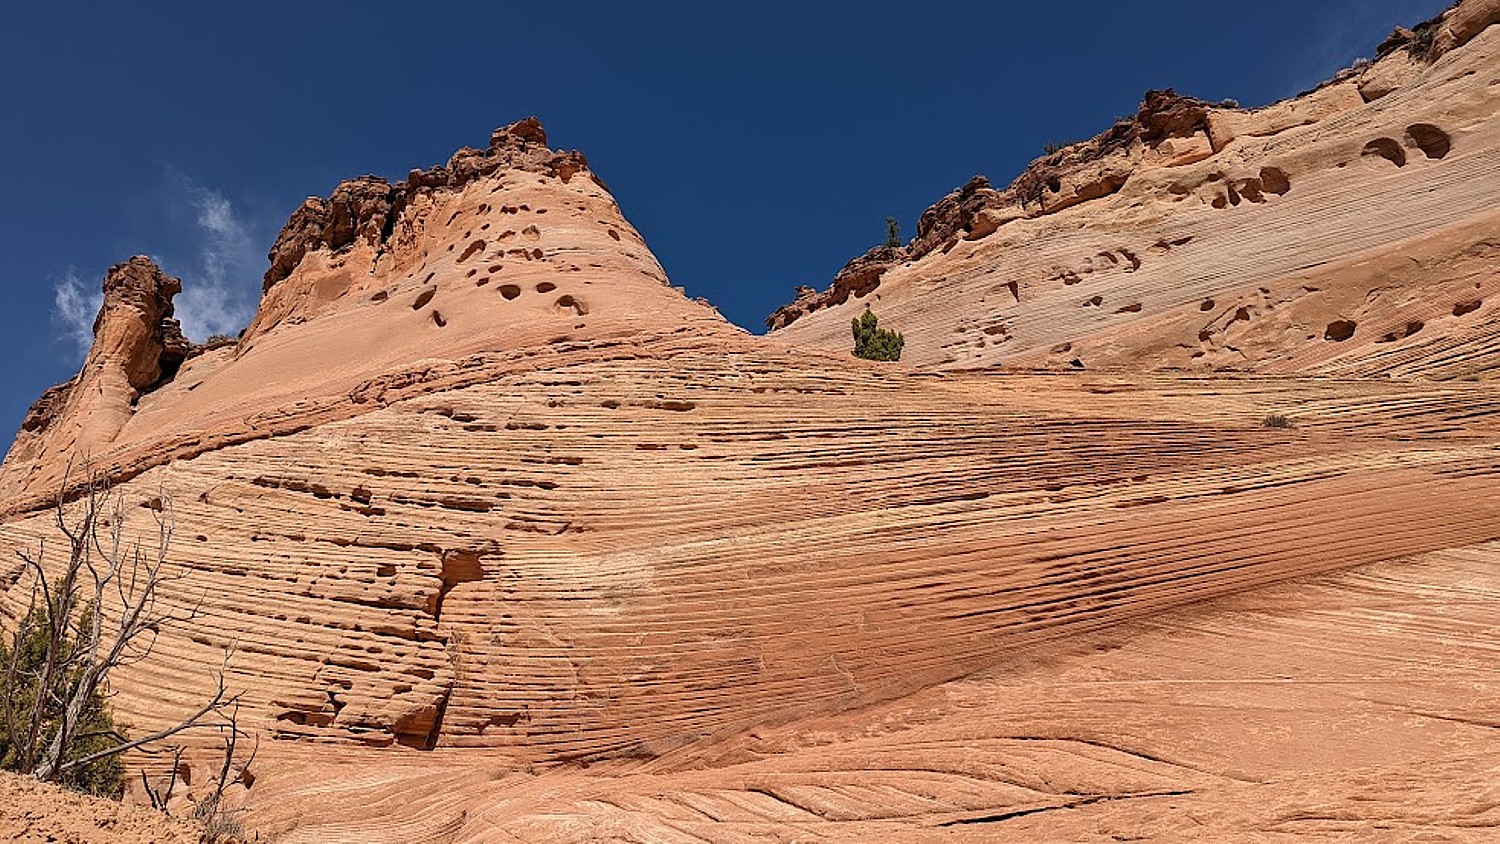
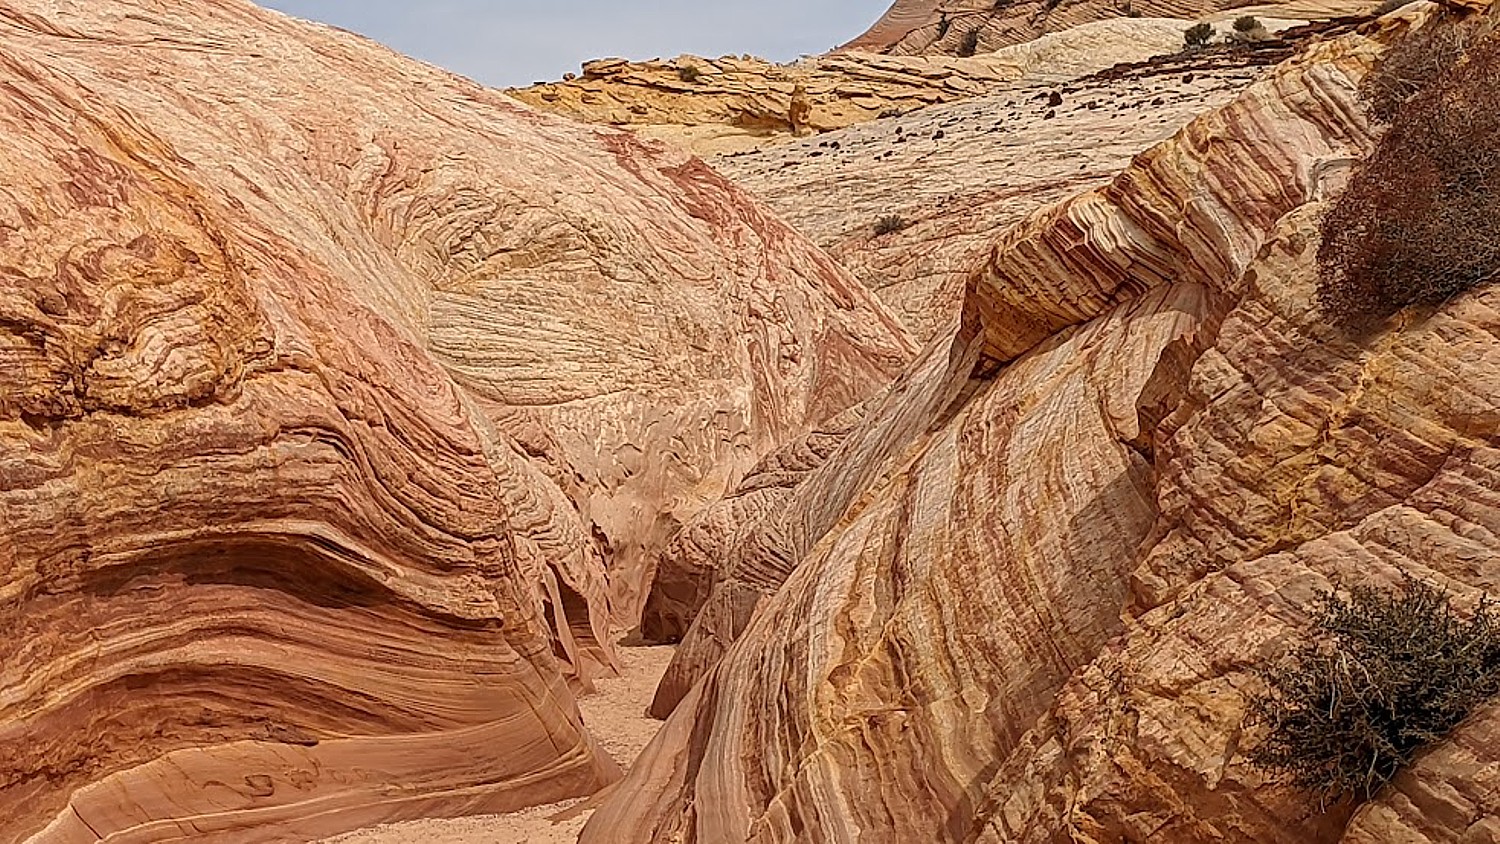
Big Horn Canyon is a tributary of Harris Wash. It runs for three miles through alternating slickrock and sand – the first two miles are in the wash. The slots cut into the Navajo sandstone rock layers displaying an unusually wide range of colors and forms.
We follow instructions which say to park at the two blue containers, then make our way down to the river bed (exactly where do we start?) and follow Harris Wash of the Escalante River, crossing it many times (and can be hard to reach when the water is higher.)
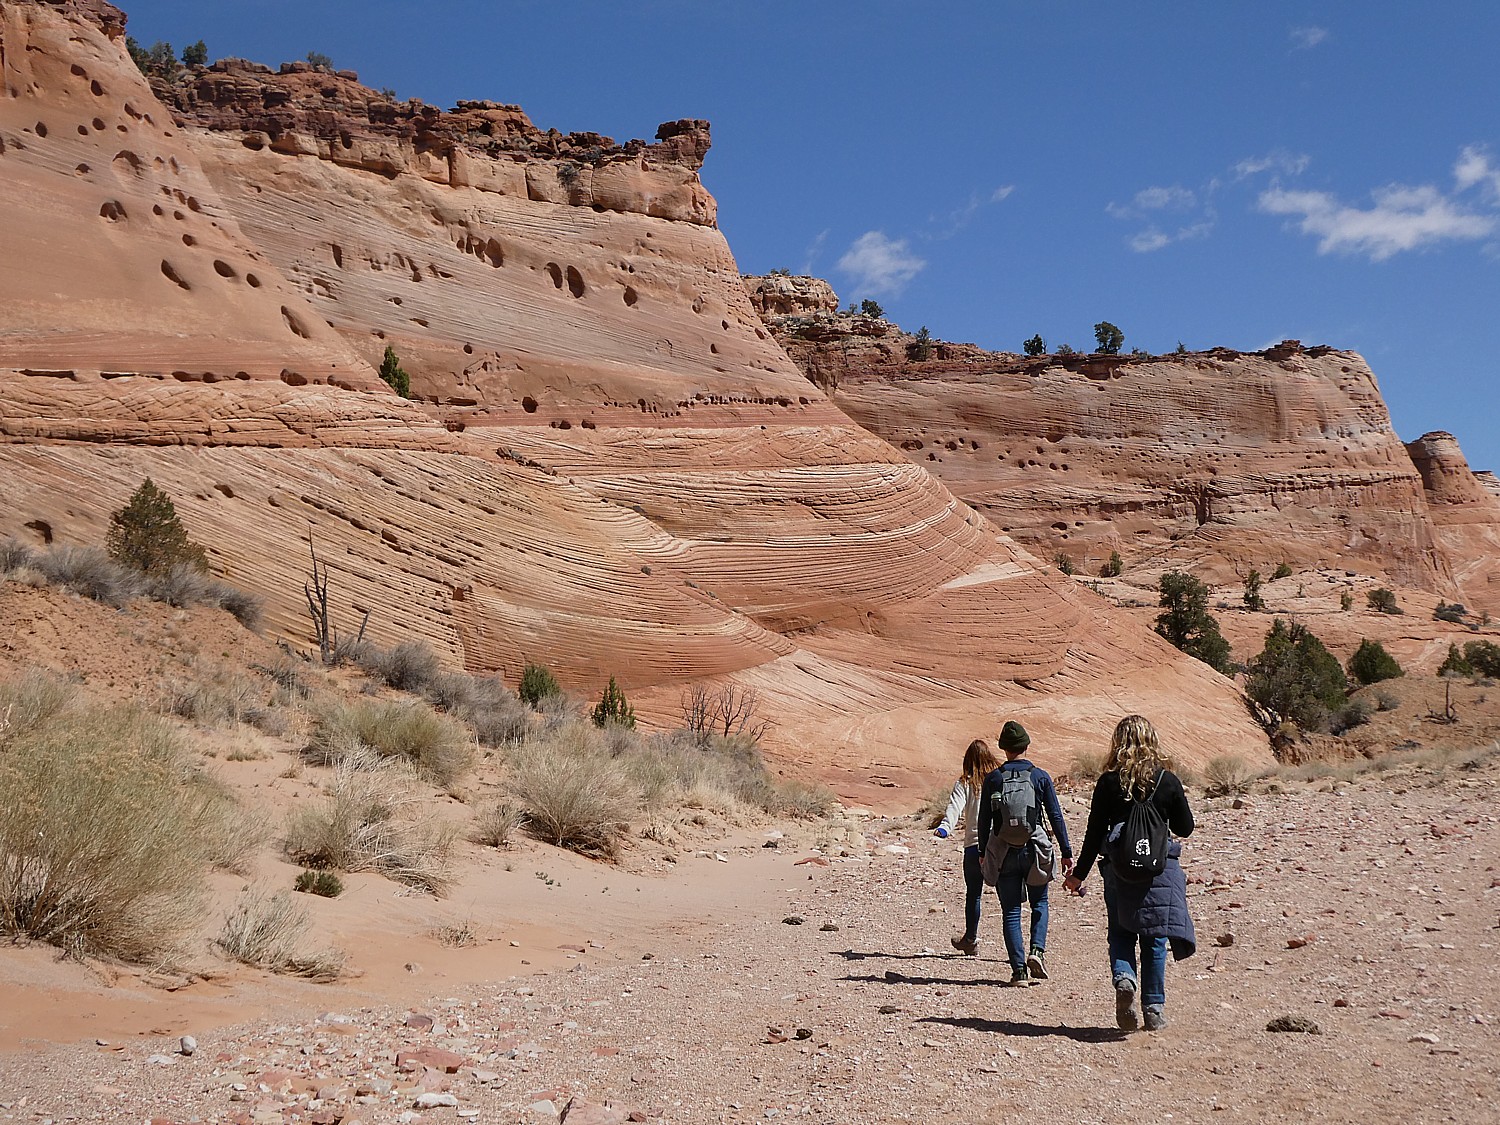
This first part of the hike to reach the canyon is pleasant – we go back and forth over a riverbed which on this day, is mostly dry.
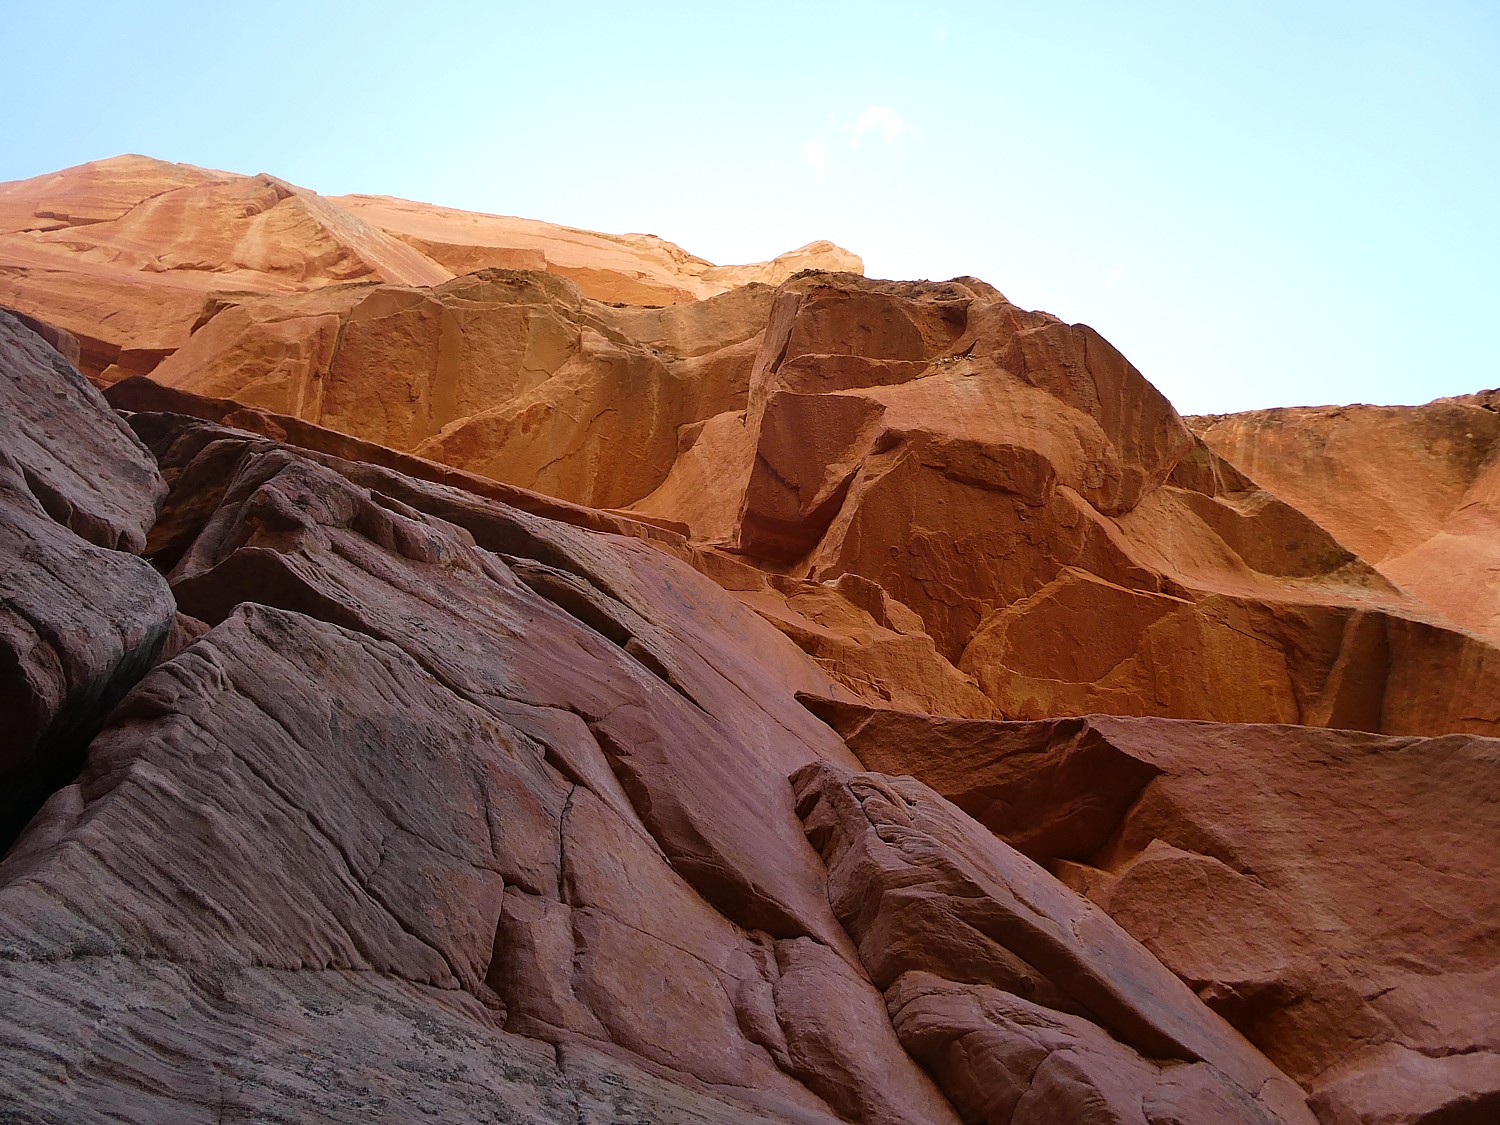
There are two slot canyons. The first over to the left is shorter and the hike ends when it becomes too narrow to pass through. The second one is long and the colors are spectacular. For a change in perspective, once the canyon walls open you can hike on the creamsicle swirled ice cream rocks.
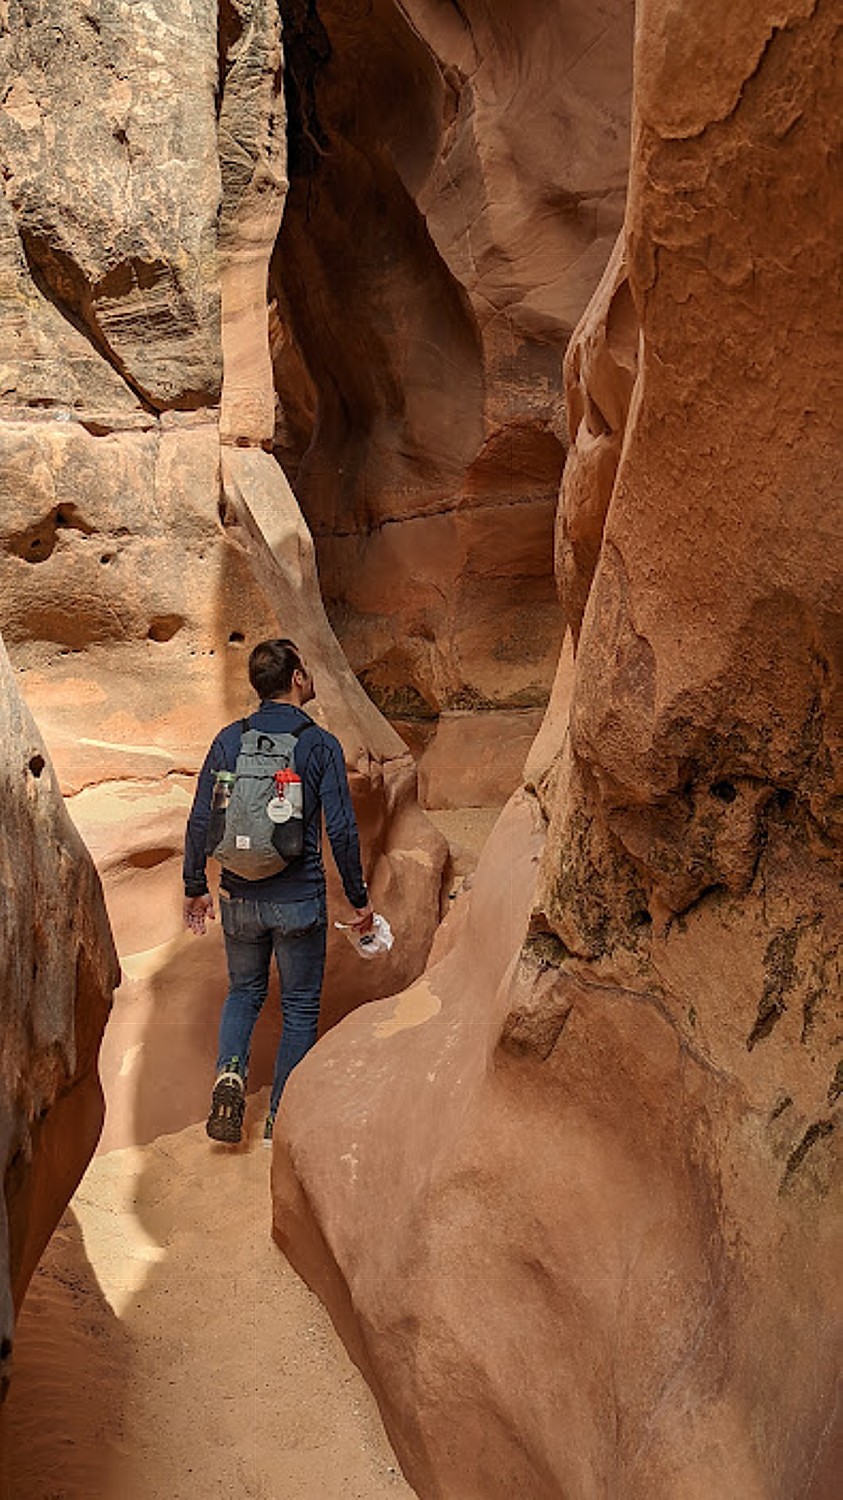
Unlike Zebra, Big Horn Canyon is really easy to navigate (no need to slither up walls) – ideal for neophytes like me.

Big Horn Canyon is magnificent. Nature puts on a fantastic display of colors, patterns, swirls and shapes. You can imagine how the ancients got their inspiration for their art. Walking through, it feels like you are the ball in a psychedelic pin ball machine.
This hike reminds Laini of Dr. Seuss’ “Oh the Places You Will Go.”
And I think to myself, how is this canyon not more popular!?! In fact, for the most part, we are completely alone – not a soul around (in contrast to Zebra which seemed to draw lots of people, despite its difficulty). It makes it all the more surreal when a couple does pop up in our space, bursting the reverie.
The hike altogether is about six miles – absolute perfection.
We are back in the car at 2:14 pm, and head out to drive to our next stop, Glen Canyon, via the Burr Trail, a scenic byway.
I have it on my list to tackle more of the best hikes in Escalante:
- Spooky Gulch is a short slot canyon hike in the Grand Staircase-Escalante area, considered moderate difficulty. You can also visit Dry Fork and Peek-a-boo as a six-mile loop, each slot slightly more difficult and narrow than the last. Laini says this was one of her most favorite hikes. (Spooky gets to be only 10-inches narrow in some spots).
- Calf Creek Falls is one of the most enchanting areas of the Grand Staircase-Escalante area, a verdant oasis amid tumbled stone monoliths, considered moderate difficulty.
- Coyote Gulch isa winding, semi-narrow canyon that snakes its way down through incredible red rock, considered difficult. Laini says that she has had this one on her list, but it requires an overnight on the hike, or a 16+ mile hiking day, 8-10 hours.
Other moderate-rated hikes include Fortymile Gulch; Golden Cathedral; Little Death Hollow; Peek-a-boo Gulch and Round Valley Draw.
Information at Escalante Interagency Visitor Center, 755 West Main, Escalante UT 84726, 435-826-5499, www.blm.gov/programs/national-conservation-lands/utah/grand-staircase-escalante-national-monument. Another visitors center is at 745 US-89, Kanab, UT 84741, 435-644-1200.
Also, https://www.utah.com/destinations/national-monuments/grand-staircase-escalante-national-monument/
See:
Utah Adventure Day 1-2: Capitol Reef’s Colorful Canyons
______________
© 2023 Travel Features Syndicate, a division of Workstyles, Inc. All rights reserved. Visit goingplacesfarandnear.com, www.huffingtonpost.com/author/karen-rubin, and travelwritersmagazine.com/TravelFeaturesSyndicate/. Blogging at goingplacesnearandfar.wordpress.com and moralcompasstravel.info. Visit instagram.com/going_places_far_and_near and instagram.com/bigbackpacktraveler/ Send comments or questions to FamTravLtr@aol.com. Tweet @TravelFeatures. ‘Like’ us at facebook.com/KarenBRubin